Home
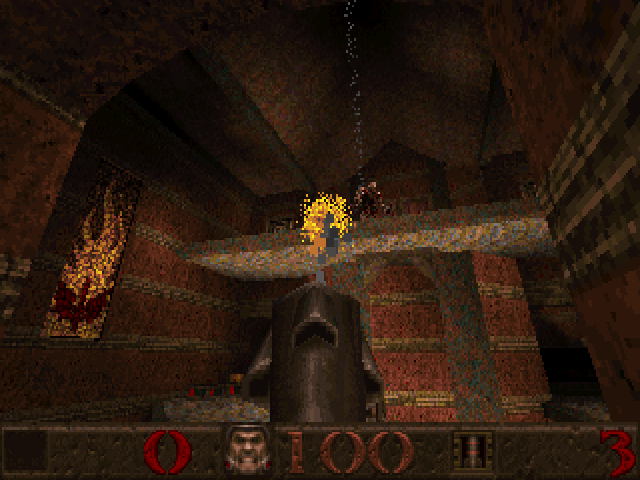
BSP Viewer V2
Jan. 2026
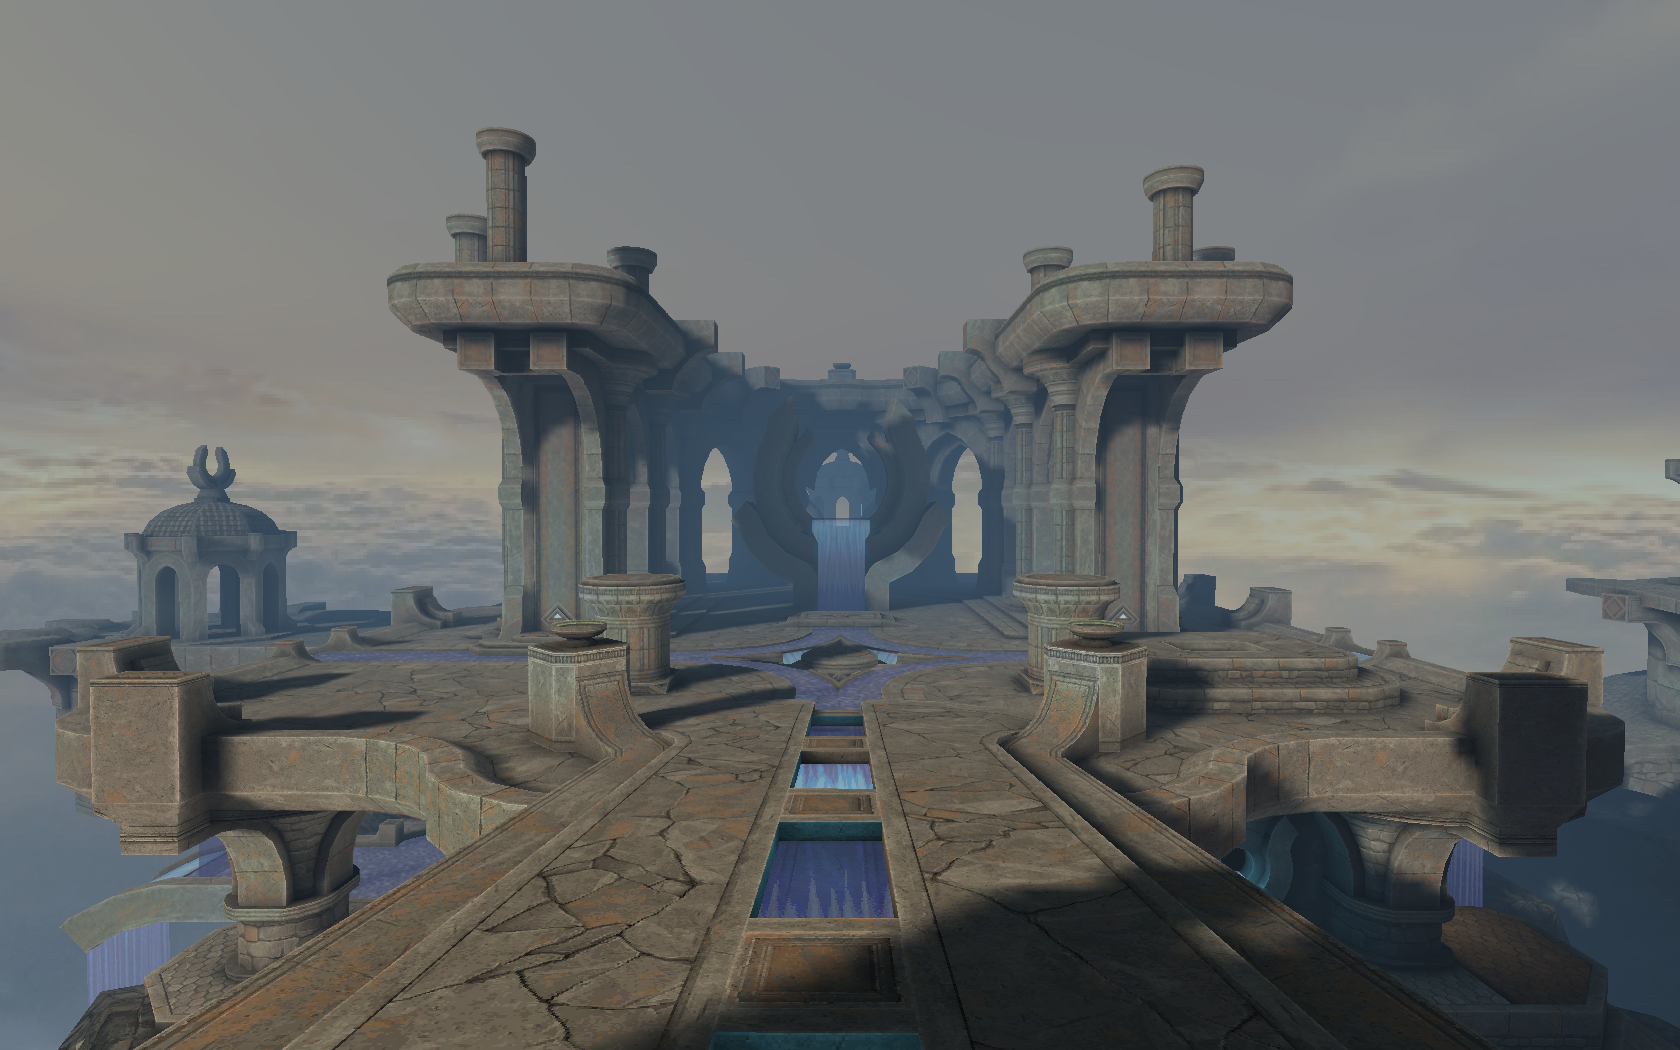
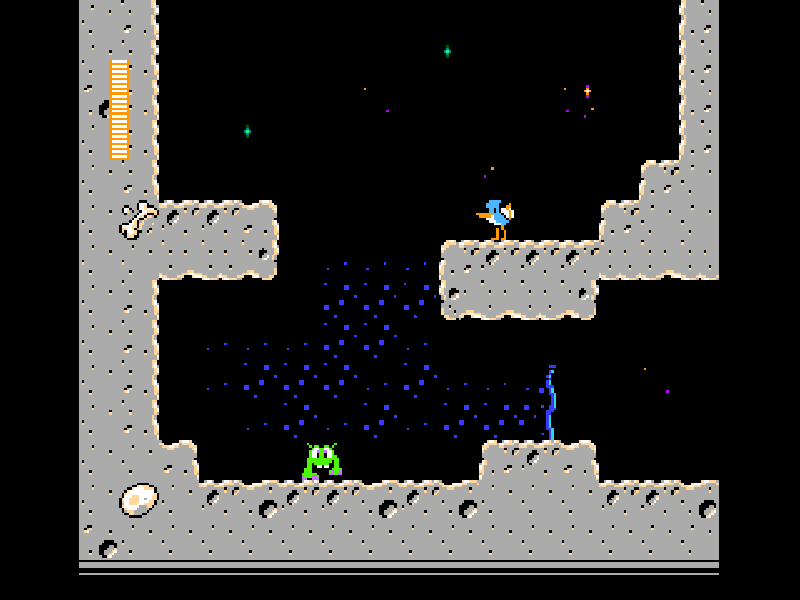
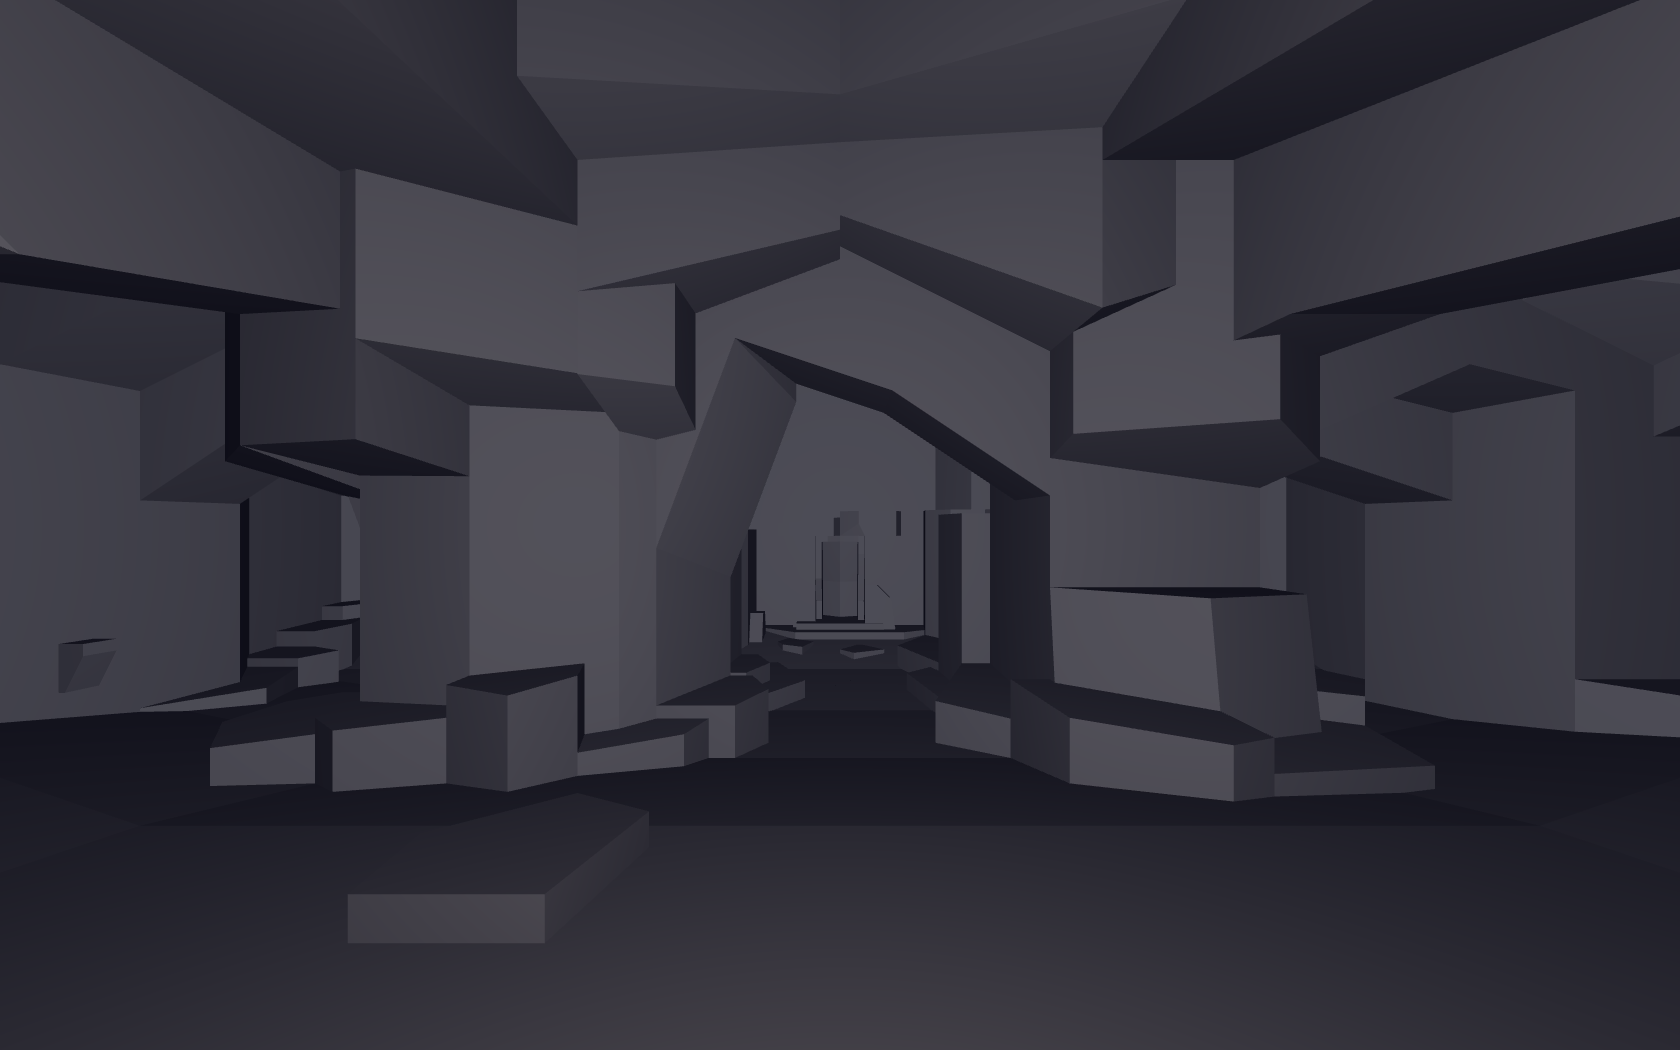
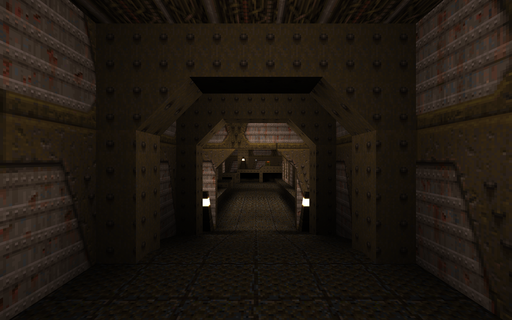
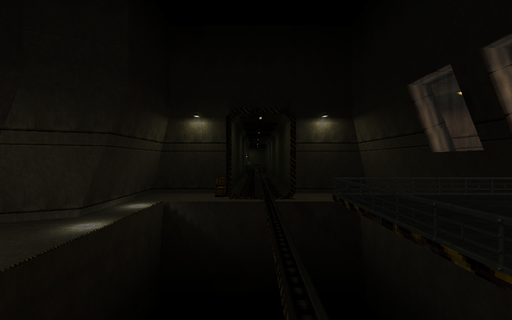
ad_tears from the Arcane Dimensions map pack
 Another BSP viewer. About a week before my first semester of college, I decided to start a new project to keep me busy. I had already written a BSP viewer about two years ago, and now I had a bit more experience to tackle it again.
The original code was quite a mess, though all things considered, it didn't turn out too bad.
For this version, I had the following goals in mind:
a) Have a unified shader architecture.
b) Work within the limitations of DX9.
c) Add mimaps and anti-aliasing.
a) Unified shader architecture
What I meant by a unified shader architecture is this: Certain effects, such as fog, were originally uniforms, and optional during rendering.
I wanted to move as much of the variable state to compile-time shader permutations that could be combined and runtime, and through a hashing of bit flags that indicate render state, select the appropriate shader for the entire pipeline.
This meant writing a sort of shader compiler that would, in a pre-process step, go through each shader permuation and generate appropriate defines to turn parts of the shader on or off depending on which primary shader was used, and which permutation bits were set.
In total, there were 12 main states, which I will include as code since it's already commented:
enum main_shader_type
{
// Generic world geometry
SHADER_WORLD,
// Generic world geometry that uses fullbright textures
SHADER_WORLD_FULLBRIGHT,
// Alphatest textures
SHADER_ALPHATEST,
// Quake 1 sky
SHADER_SKYSCROLL,
// Cubemap skybox
SHADER_SKYBOX,
// Water, lava, slime, etc...
SHADER_TURB,
// Like above, but with a wateralpha uniform
SHADER_TURB_WATERALPHA,
// Solid materials requiring transparency
SHADER_TRANSPARENT,
// Liquid materials requiring transparency
SHADER_TURB_TRANSPARENT,
// Material that replaces texture and lightmap with a solid color
SHADER_ENV_COLOR,
// Blit from one render target to another
SHADER_BLIT,
// Unused for now?
SHADER_FONT,
};
and 7 sub states - each main state could effectively have a variant of one of the following:
#define BIT(n) (1 << (n))
#define PERM_GENERIC BIT(1)
#define PERM_FOG BIT(2)
#define PERM_LIGHTMAP BIT(3)
#define PERM_FULLBRIGHT BIT(4)
#define PERM_DEBUG_DIFFUSE_COORDS BIT(5)
#define PERM_DEBUG_LIGHTMAP_COORDS BIT(6)
#define PERM_EARLY_Z BIT(7)
- Generic - No special effects
- Fog - EXP2 fog
- Lightmap - Lightmap only rendering.
- Fullbright - No lightmap contribution.
- Debug diffuse - Render the diffuse texture coordinates.
- Debug lightmap - Render the lightmap texture coordinates.
- Early Z - Z prepass (not used as far I remember).
So, for example, you could have two shaders:
SHADER_WORLD with PERM_GENERIC and,
SHADER_WORLD with PERM_FOG.
At runtime, if fog was enabled, the second permutation would be used for every frame until the fog was turned off.
The only runtime cost is that hash table lookup to get the correct shader object. The shader itself will have been compiled to exactly what was needed.
A result of this fine-grain control is that the longest pixel shader is only 20 instructions in ps_2_0 assembly, because all flow control had effectively been decided at compile time.
The first time I heard about such a workflow was after reading Valve's presentation on their Half-Life 2 shader generation, named Half-Life 2 / Valve Source Shading, in which they had compile time constants dictate how a shader would perform. According to their presentation, they had 1920 pixel shaders generated via this processes. The presentation can be found here.
My approach only yielded 62 pixel shaders, and many of those were actually duplicates at the assembly level. At shader load time, I would hash each shader and see if an existing version could be reused. After hashing and de-duplicating, I had 36 unique pixel shaders.
This may seems like a lot of shaders, but in reality, only about 4 of these are ever used in a single frame at any given time, so the penalty of shader switching is quite minimal.
To conclude this section, I will include the vertex layout used in the engine for those curious:
// C++ representation
// 32 bytes per vertex
struct m_vertex
{
float3 Pos;
s16 MaterialID[2];
// Texture coordinates use 16-bit floats to save space.
half2 TexcoordDiffuse;
half2 TexcoordLightmap;
float DiffuseAndLightmapID[2];
};
// HLSL
struct vs_in
{
float3 pos : POSITION;
float2 texcoord_diffuse : TEXCOORD1;
float2 texcoord_lightmap: TEXCOORD2;
float2 texture_id: TEXCOORD3;
int2 material_id : TEXCOORD4;
};
struct vs_out
{
float4 pos : POSITION0;
float3 color : TEXCOORD0;
float2 texcoord_diffuse : TEXCOORD1;
float2 texcoord_lightmap : TEXCOORD2;
float2 texture_id : TEXCOORD3;
#if INCLUDE_INTERP_MATERIAL
float4 material : TEXCOORD4;
#endif
#if INCLUDE_INTERP_FOG
float fog_factor : TEXCOORD6;
#endif
};
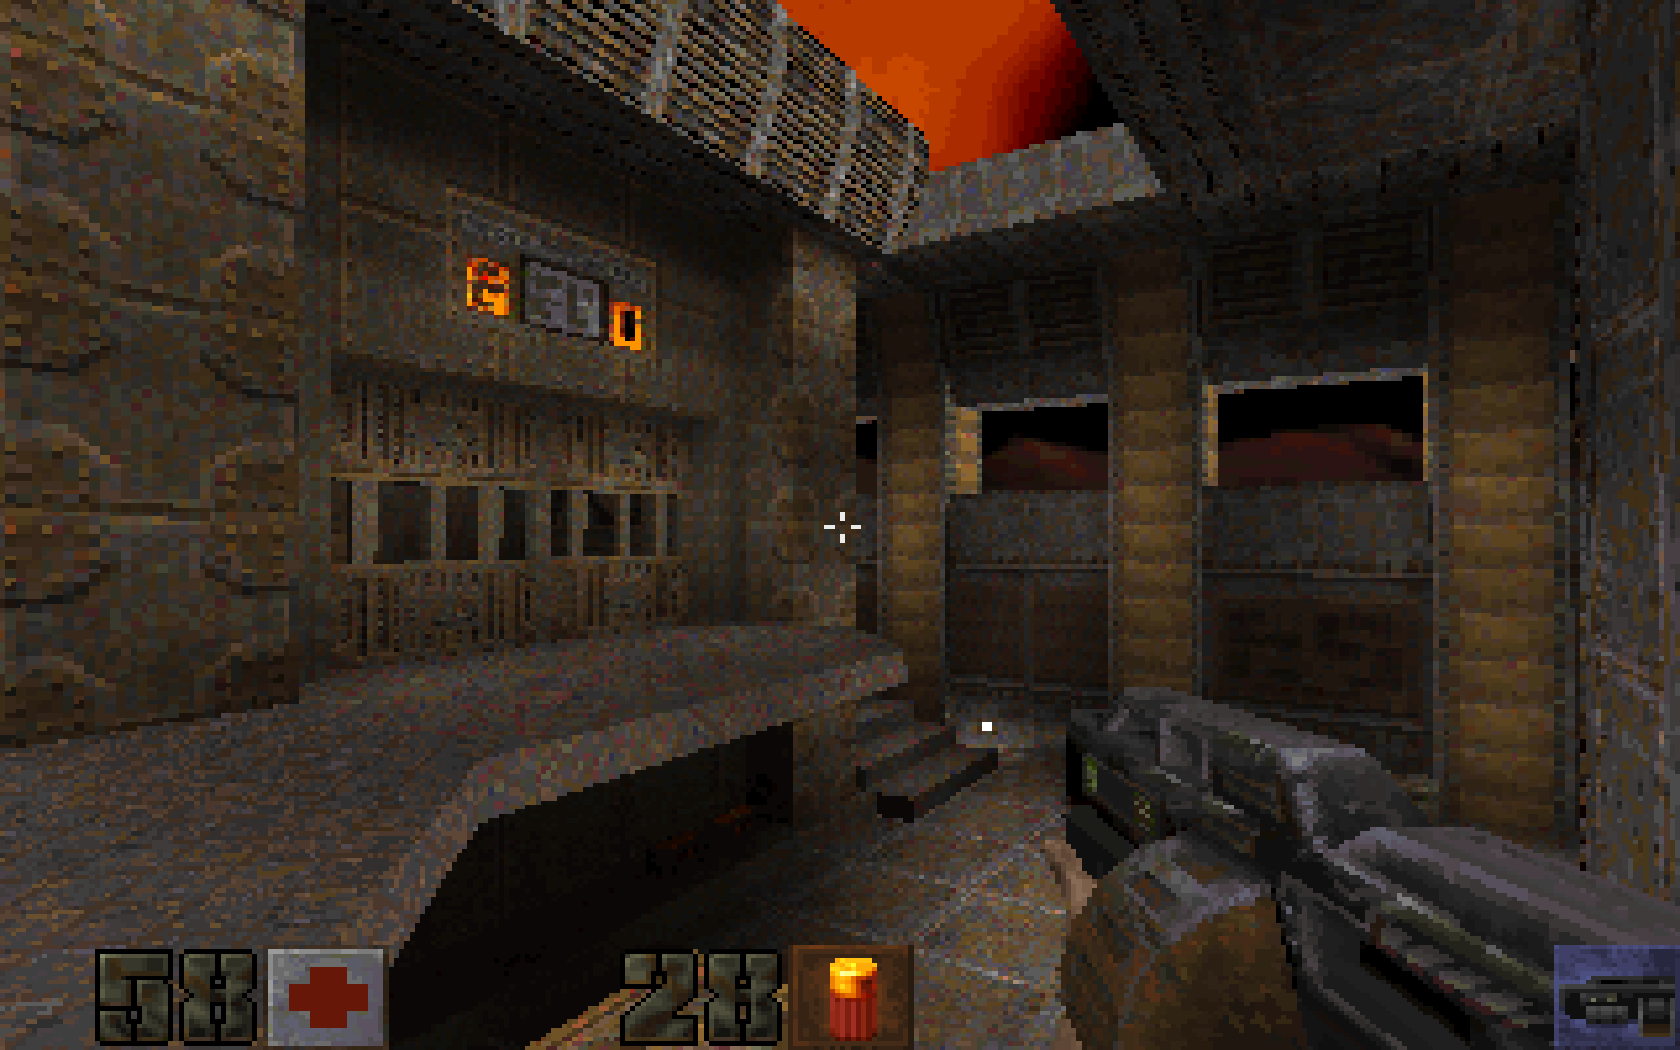
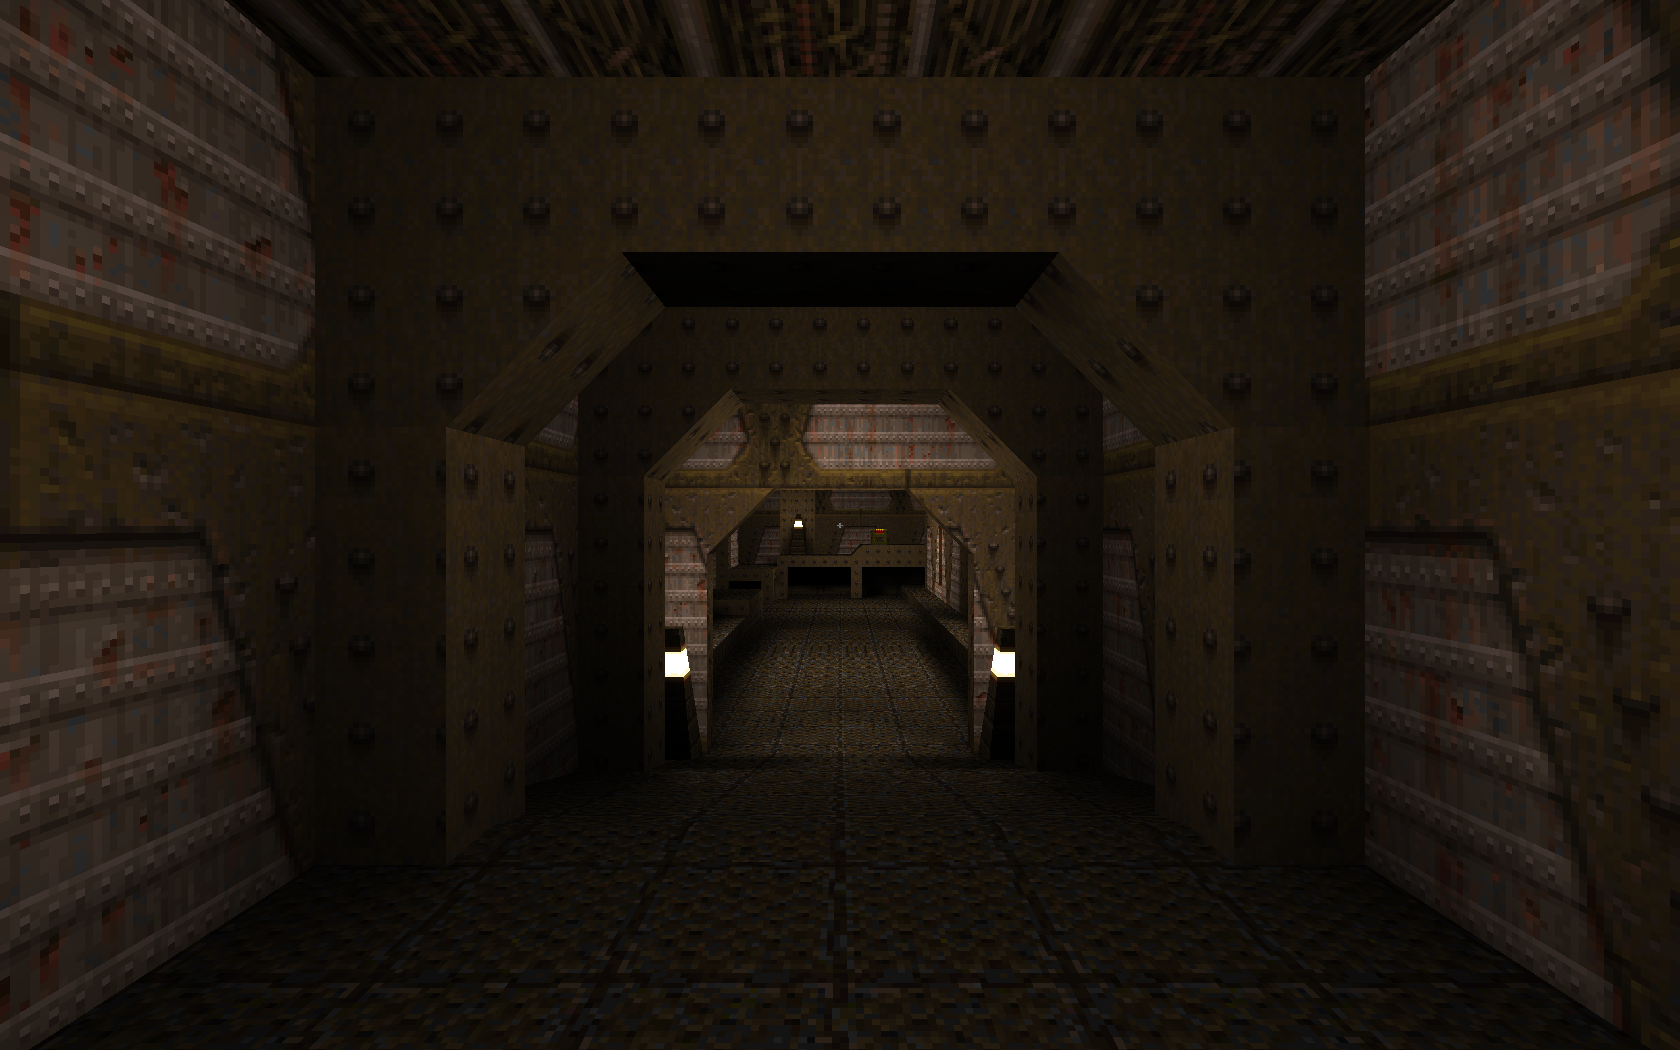
b) Work within the limitations of DX9.
I had the idea of writing an OpenGL wrapper for DX9, and translating the shaders with mojoshader, but I've since abandoned that idea and stuck to just DX. I may revisit it in the future.
I faced a number of challenges working within the limitations of DX9. The first was the lack of real integer types. Even though the hardware has long had support for integers, at the API level, this simply does not exist in DX9.
I needed to create an RGBA32F texture to serve as a lookup table for the lightmaps, and was having all sorts of issues sampling from it.
Turns out there are miniscule precision errors during interpolation, even if all values of a vertex for that interpolator are the same.
This resulted in an integer conversion being off by 1 on occasion, and it was driving me crazy.
To fix this, I needed to do the following:
float lookup_id = floor(texture_id + 0.1);
Where lookup_id can now be converted to a 2D texture coordinate that can be used to sample a lookup texture.
After this change, I was able to use this value to sample lightmap coordinates for each face.
Another issue, somewhat related to this was the precision loss when converting from an arbitrary floating point whole value to a fraction for UV sampling.
Suppose we have a 1000x20 lookup texture, where lookup_id is a 1D index.
float2 uv;
uv.x = lookup_id / 1000;
uv.y = (lookup_id / 1000) / 20;
float4 value = tex2D(tex, uv);
That's all well and good, but I found that having the texture dimensions be non-powers of two was causing very strange precision loss.
To work around this, I explicitly hardcoded the texture width to be 1024, and the texture height was padded to the larget power of 2 that accomodates the number of elements in the table.
Our new texture dimensions are now 1024x32, and magically, the precison issues are solved.
c) Add mimaps and anti-aliasing
Originally, I had the idea of packing the diffuse texture into a megatexture and indexing into that using a lookup table. This is exactly what I did in my first version. Problem: It becomes almost impossible to implement accurate mimaps, and take advantage of hardware anti-aliasing features.
I'm sure that using OpenGL's bindless texture extension or using Vulkan would alleviate many of the troubles earlier APIs caused in regards to texture binding.
Alas, as I was still using DX9, I had to give up my nice branchless plan and fall back to one of the original strategies that Quake used to render its world: Texture Chains
The idea is that you would group the world geometry by the texture that it used, render all geometry with that texture, and repeat until all texture groups have been rendered. In psuedocode, it would look something like this:
// Preprocess step
for poly in model
{
polys[poly.texture_id] += poly
}
// Rendering step. Step through each chain. MAX_TEXTURES_PER_LEVEL is 512 here
for texture_id in 0 to MAX_TEXTURES_PER_LEVEL
{
if(!polys[texture_id].empty())
{
bind(texture_id)
render(polys[texture_id])
}
}
The real code is more involved of course, but that's the basic idea.
Splitting up the world like this allowed me to accurately generate mipmaps for each texture, as well as use MSAA without weird artifacts.
Even with all of these texture binds (a typical level may have about 100 to 200 textures), the performance is still in the thousands of frames per second
on the original id levels using a GTX 670, so it's really not as bad as I had feared. This is also partly due to the very small shader instruction count.
d)Further optimizations
Texture packing
Memory allocator
Like a lot of developers, I ended up writing my own allocator for the runtime of this engine.
It makes a lot more sense, and is far easier to sub-allocate out of a shared memory pool than to keep track of potentially thousands of
std::vectors and on top of that, have to deal with whether it's passed by reference, or pointer, or by value, and whether it will create a copy of itself for any reason.
I had written memory allocators before, but never a general purpose allocator that was actually used in anything but the most trivial code.
As a starting point, I referred to K & R and implemented their memory allocator as a starting point. It can be found in Chapter 8, Section 8.7.
After making my dynamic array class use this new allocator, I found it to be much, much slower than the current CRT version of malloc(). But hey, it did work, and I was not leaking memory anymore.
However, something had to be done about the performance.
After a few days of thinking, I wrote something that I called a slab allocator. I am not sure what the proper name actually is.
Essentially, it's a collection of linked lists. Each linked list in the collection represents an array of equally sized memory slices, which are fixed to a power-of-2.
Refer to the following diagram for the memory layout.
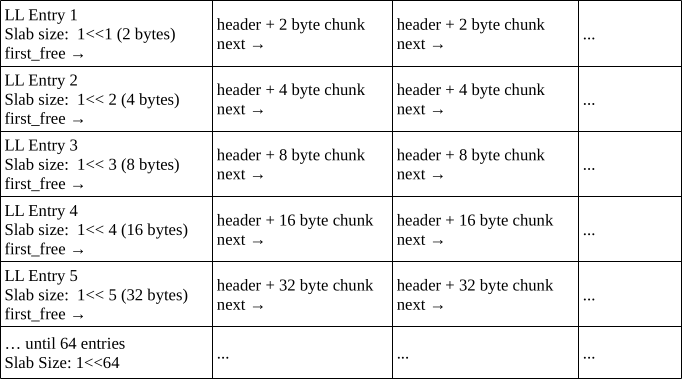
struct slab_header_t
{
union
{
struct
{
// Next free node
slab_header_t *next;
u64 size;
u32 flags;
u32 magic;
};
u8 pad[32];
};
};
struct slab_table_t
{
u64 size = 0;
slab_header_t *first_free = 0;
};
The interface to the allocator is surprisingly simple.
struct slab_allocator
{
slab_table_t entries[64] = {};
int get_index(u64 size)
{
// Make sure the size is a power of 2
// Any other size indicates an error in the logic, no slab should have a non-pow2 size.
Assert(popcount64(size) == 1);
int index = msb64(size);
Assert(index >= 0 && index < 64);
return index;
}
bool32 exists(u64 size)
{
int index = get_index(size);
return entries[index].size != 0;
}
void insert(u64 size)
{
slab_table_t entry = {};
int index = get_index(size);
entry.size = size;
entries[index] = entry;
}
slab_table_t *get(u64 size)
{
int index = get_index(size);
return &entries[index];
}
void reset()
{
memset(entries, 0, sizeof(entries));
}
};
When memory is allocated, the size gets promoted to the next highest power of 2 (unless it already is a power of 2).
A neat property of this approach is that looking up the correct linked list of slabs is potentially a constant time operation. msb64() is actually implemented
using the bsr instruction (_BitScanReverse64() when using Microsoft's headers).
Using msb64(), we get the index of the array element, and insert a new entry into the linked list.
The linked list works in LIFO order. That is, the most recently freed item is always at the head of the list, ready to be allocated again.
Refer to the (greatly simplified) psuedocode below
void *malloc(size_t size)
{
size = next_power_of_two(size);
if(!entries.exists(size))
{
entries.insert(size);
}
slab_table_t *entry = entries.get(size);
slab_header_t *result = 0;
if(!entry->first_free)
{
result = alloc_header(size);
}
else
{
result = entry->first_free;
entry->first_free = entry->first_free->next;
}
// Return the memory after the header
return result + 1;
}
Freeing is even simpler.
void free(slab_table_t *entry, slab_header_t *header)
{
Assert(header_is_valid(header));
header->next = entry->first_free;
entry->first_free = header;
}
After implementing this allocator, the performance was on-par, or perhaps even exceeded the CRT malloc(), and I could stop worrying about memory allocations for the most part.
DXT conversion
Games from the 2000s often used texture compression to save both on-disk memory and runtime memory.
As Quake was written before the advent of mass hardware accelerated texture decompression, it used raw RGB data in its OpenGL version.
I wanted to see what memory savings / performance I could get from compressing the textures.
As the assets are stored in a paletted format, I first converted the data to RGBA. The data stayed this way in the engine for some time, until I decided to give texture compression a go.
The most popular form of texture compression for plain, non-alpha textures, from what I could gather, was DXT1.
To qualify for texture compression, a level texture could not be used for:
- Transparency
- Alphatest
- Sky
- Animation
The following line in the source code checks this with bit flags:
u32 NoDXTMask = TF_TRANSPARENT | TF_ALPHATEST | TF_SKIP | TF_SKY | TF_ANIM;
So, in other words, it had to be a plain ol' texture with nothing fancy going on.
At first, I used the D3DX function D3DXLoadSurfaceFromMemory() as a proof of concept. This worked well, but on levels with a large amount of textures, it was eating into the loading time. I tried multi-threading the code, but the D3DX functions are seemingly not thread-safe by default, so I had to find another way.
Thankfully, there is a very nice library that did exactly what I needed: stb_dxt.h.
Because the memory allocator I wrote was not inherently thread safe, all texture memory had to be pre-allocated in the main thread before being sent off to be compressed. The worker thread generated a complete mip chain, and DXT compressed each mip level if required. This resulted in much faster loading times, both because the compression itself was faster, and because I was taking advantage of multiple threads.
From testing several maps, this resulted in a 30-45% decrease in overall texture memory usage per level.
I did not see any significant performance improvements from regular timing benchmarks, but maybe something would show up in a GPU profiler.
All in all, this was about two months of work on and off.
Quake II Port
Jul. 2025
Port of Quake II, originally by id Software
 Windows and Linux port of id Software's Quake 2.
* SDL2 backend
* Supports Software, GL, and Kolorsoft renderers.
* Supports both official expansion packs: The Reckoning and Ground Zero.
* Has game controller support via SDL_gamecontroller.
* Full support for audio and soundtrack playback in .ogg, .mp3, .flac, and .wav formats.
Underrun Remake
May. 2025
Original game and art by Dominic Szablewski
 I don't remember exactly how I stumbled upon this game, but it certainly left an impression on me.
What intrigued me was the simple level format, just a .png image with color coded pixels indicating various level elements such as walls, the player, and enemies.
Around 2022, I tried writing a simple renderer for the levels, which kind of worked, but it was still fairly early in my days of learning OpenGL.
Fast forward to 2025, and I now had the experience to make an adaptation of the original game from scratch, using only the assets.
Occasionally I did use the game's original source code as a reference.
There are no enemies in my version, it's purely an exploration game, but you can shoot.
The original game can be found on this page.
Github source.
Also check out q1k3.
Fake GL
May. 2025
Quakespasm running completely under D3D9 with emulated OpenGL calls
 A Direct3D9 replacement for all fixed-function OpenGL calls used in the Quakespasm port of Quake.
I'm not sure if this has any practical use (Xbox port?), but it was definitely fun to write and a good excercise. At points, it almost felt like writing a simplified graphics driver. I was initially inspired after seeing gl_fakegl.c from the JoeQuake's source code.
There's no shader support, but there is support for multi-texturing to speed things up a little.
This is my second or third attempt at this kind of thing. There are two major optimizations / differences in this version compared to the previous versions.
The first, is that I used a command buffer to record all rendering commands, and deferred their execution until it was time to render (usually in GL_EndDrawing(), and once before before calling Present(). Even functions that allocate memory (typically glTexImage...) actually make a temporary copy of the pointer that they are passed, and free it only when running through the command list. This approach greatly simplified state tracking, since in my previous attempts I had to keep track of how the state of each call affected the rest of the OpenGL "state machine". The only immmediate state was the vertex submission when glVertex() was called.
The implementation is quite simple, it's simply a tagged union with the command type as its first member, and structs within for each type to serve as function arguments for further processing. See the following example:
typedef enum
{
RENDER_COMMAND_CLEARCOLOR,
RENDER_COMMAND_VIEWPORT,
// More types here...
} command_type;
typedef struct
{
command_type Type;
union
{
struct
{
uint32_t ClearColor;
} cmd_clearcolor;
struct
{
float x;
float y;
float w;
float h;
} cmd_viewport;
};
// More commands here...
} render_command;
The second optimization was batching up vertices in glBegin() / glEnd() calls. The naive approach to this would be to issue a draw call on every glEnd(), either with DrawPrimitive() or DrawPrimitiveUP(). This is the approach taken by gl_fakegl.c, and was how I did things in the first attempts. Of course, this is terribly inefficient, but for the level sizes that the original Quake offers, and the amount of geometry that is typically visible at any one time, it's actually playable without any lag (this will depend on your GPU).
The first thing I did was manually triangulate all of the vertices so that they are usable in indexed rendering with D3DPT_TRIANGLELIST. This isn't actually as slow as it sounds, and was not a bottleneck. The MSDN page on glBegin() describes how the vertices should be considered for each primitive type supported by OpenGL, and I used this for reference. When implementing GL_LINES, I had the idea of creating a degenerate triangle with [x0, y0], [x1, y1], and [x0, y0] as the vertices. To my surprise, it actually worked! GL refuses to render such an arragement of vertices, however.
The triangulation helped with keeping a uniform code path so that it was only necessary to consider one primitive type, but it wasn't enough. Larger maps still slowed the engine down to a crawl. I was determined to run the Arcane Dimensions map pack, so for every call to glEnd() I did the following:
- Flushed the command buffer
- Checked to see if any rendering state relating to presentation has changed. This includes things like matrix operations or texture binding.
- If yes, flush the vertices and issue a draw call, otherwise, continue batching
This optimization saved on hundreds, if not thousands of redunant draw calls, and allowed the smaller of the Arcane Dimension maps to run without lag.
The larger maps still suffered frame drops, because I was still issuing thousands of DrawPrimitive() calls even in the best cases.
Software Skinning Demo
May. 2025
'tiny.x' model from Microsoft's D3D SDK. Based on Etay Meiri's OpenGL skinning tutorials
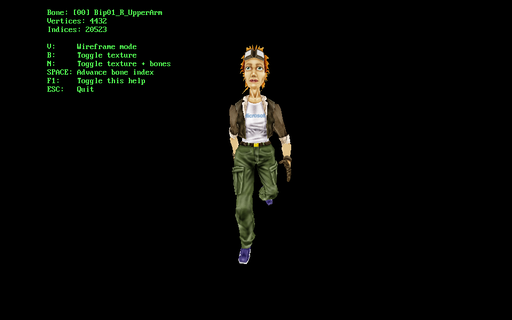 After I implemented a version of GPU skinning, I wanted to see how it would perform if I did everything in software only.
Turns out, skinning even one model using the method described in the tutorial was a major CPU bottleneck, using roughly ~40-45% of a single core on my 3.1 GHz CPU. After this exercise, I have a lot more respect for the programmers that implemented skeletal animation in software before the advent of GPU skinning.
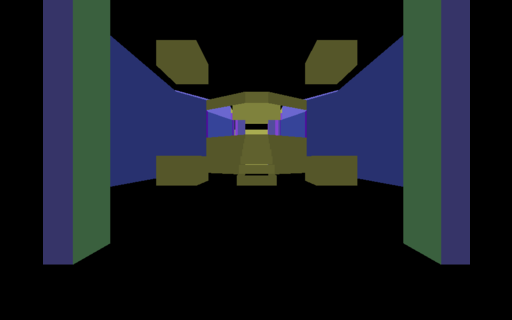
D3D9 Terrain Demo
May. 2025
Based on 'Chapter 18 - Props' from Frank Luna's D3D9c tutorials
 Several years ago I first learned DX9 with Frank Luna's excellent D3D9 tutorials.
The main difference back then was that I had no idea that the DirectX SDK was a thing, and I effectively programmed with little to no documentation, using only the header files and existing code as a reference.
After installing the documentation files from the SDK, I was in a much better position to try this series again.
I didn't want to start from the very beginning, so I focused on Chapter 17 and 18's content.
This demo features:
* First person camera
* Frustum culling
* Environment mapping
* Per-object materials and textures
* Ambient, specular, and diffuse lighting,
* Water effects, water ripples as the player moves through water
* Fog
You can get the 2010 version of the SDK here
Doom Viewer
May. 2025
Basic Doom level viewer, rendered with OpenGL. Inspired by this playlist by Coder Space
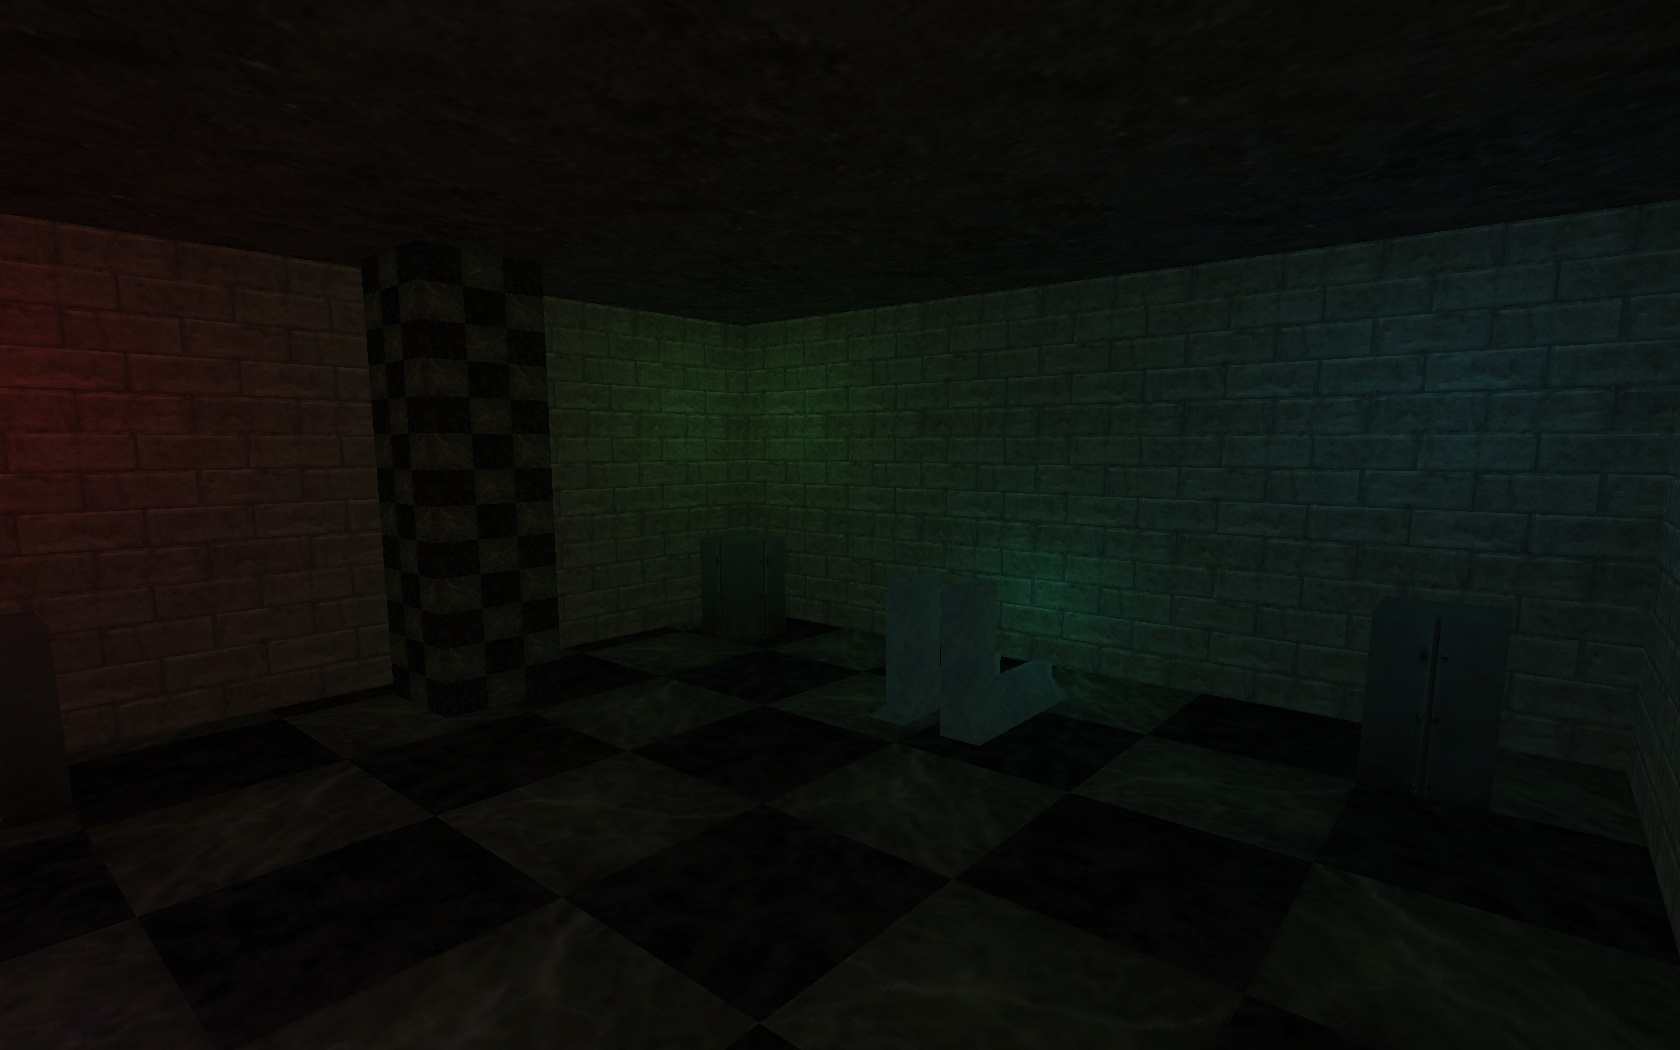
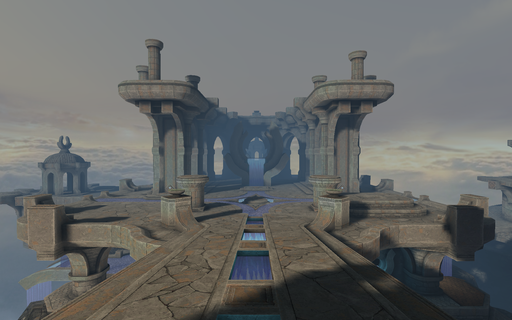
Source BSP Viewer
May. 2025
de_train_old.bsp

Operating System
Mar. 2025
ELF based x86 operating system
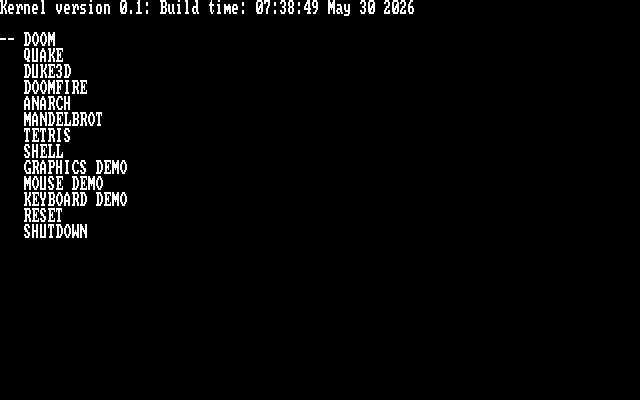
 A fully custom 32-bit operating system written from scratch. Think a very simplified DOS.
What this has:
* GRUB bootloader
* 640x400 RGB framebuffer
* PS2 keyboard support
* Soundblaster-16 16-bit audio support (mono and stereo) using auto-initialization mode
* Very simple exec model. Only a single process may run at a time
* Runtime dynamic linking
* Console-style main menu
* Basic shell for executing commands
* Virtual file system (everything is effectively loaded into RAM from the disk image)
Noteable software ported:
* Doom
* Quake I
* Duke Nukem 3D
This OS was primarily worked on between the months of March 2025 and September 2025. It was compiled with a custom build of GCC, and tested in QEMU.
File Server
Feb. 2025
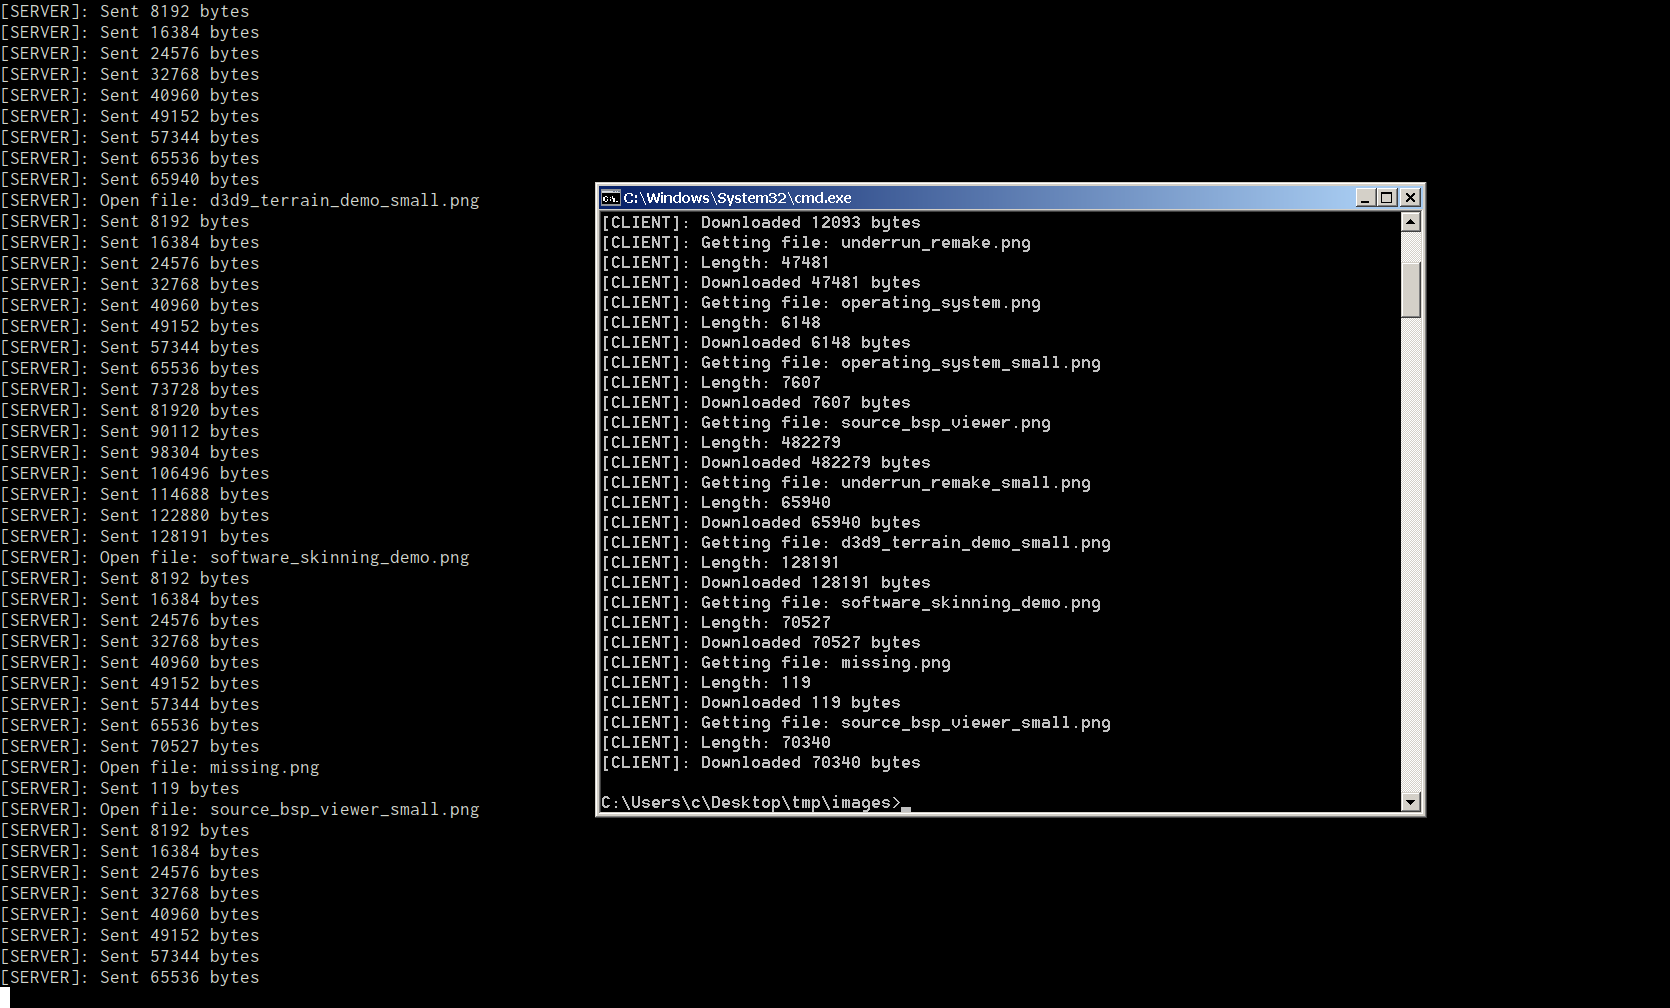
Shows file transfers happening over LAN on two different computers. The screenshots were later combined for this image
 A custom client-server program that recursively transfers an entire directory over LAN (ethernet, no router required).
I initially wrote this to speed up testing cross-compiled builds from Linux to Windows without needing to transfer things over USB, or use ssh, though this program has since found other uses. There's currently a bug that breaks things when hidden folders are transfered.
A newer, less buggy Python version has since been written that serves a similar purpose.
Controller Test Utility
Jan. 2025
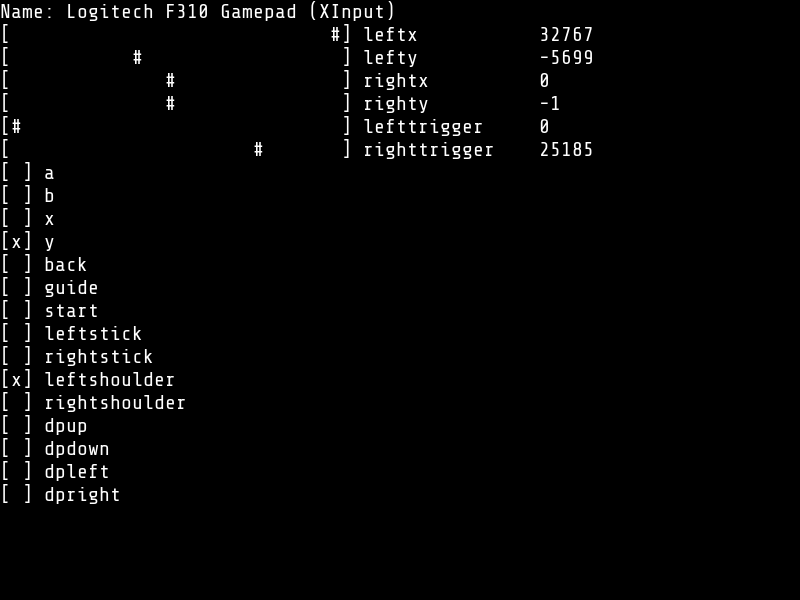
Uses the SDL_GameController API (SDL2)
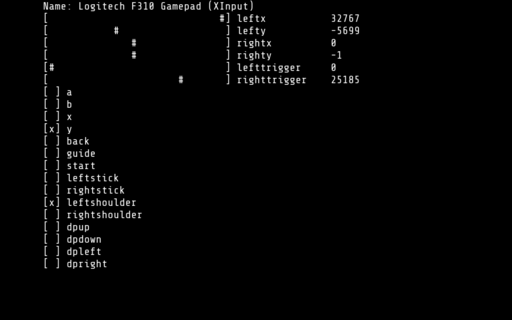 Simple diagnostic utility for game controllers written using SDL and C.
It can display the output both to the console, or to a regular graphical window.
I wrote this utility while adding controller support for the NES Emulator.
DCPU-16 Emulator
Jan. 2025
Inspired by this video by Joel Yliluoma
 Yet another emulator! I was still fresh from working on the NES emulator, and wanted another challenge. Thankfully, Bisqwit had just the video.
This one is based on the DCPU-16, a theoretical CPU specification that was to be used in an upcoming game by Mojang named 0x10c which unfortunately never saw the light of day, although some early footage of the game still remains. However, some documents from the game, such as these specifications survived, and people got to work implementing emulators and software for it.
The emulator is clocked at 2000 cycles per frame, @60 frames per second. In effect, this works out to a 120KHz clock.
The binary for the pacman game can be found here
Many thanks to Bisqwit for having his source code published. I had some difficulties getting the sprite rendering to work, and his code was what I turned to when things weren't working.
NES Emulator
Jan. 2025
Space Gulls 1.1 by Morphcat Games. Emulator based on this series by David Barr
 Fully working NES emulator, with sound and game controller support.
Written while following this tutorial series by David Barr.
Supports the following mappers:
* 000 NROM
* 001 MMC1
* 002 UNROM
* 003 CNROM
* 004 MMC3
* 007 AxROM
* 030 UNROM 512
* 066 GxROM
* 069 SUNSOFT FME-7
* 113 HES NTD-8
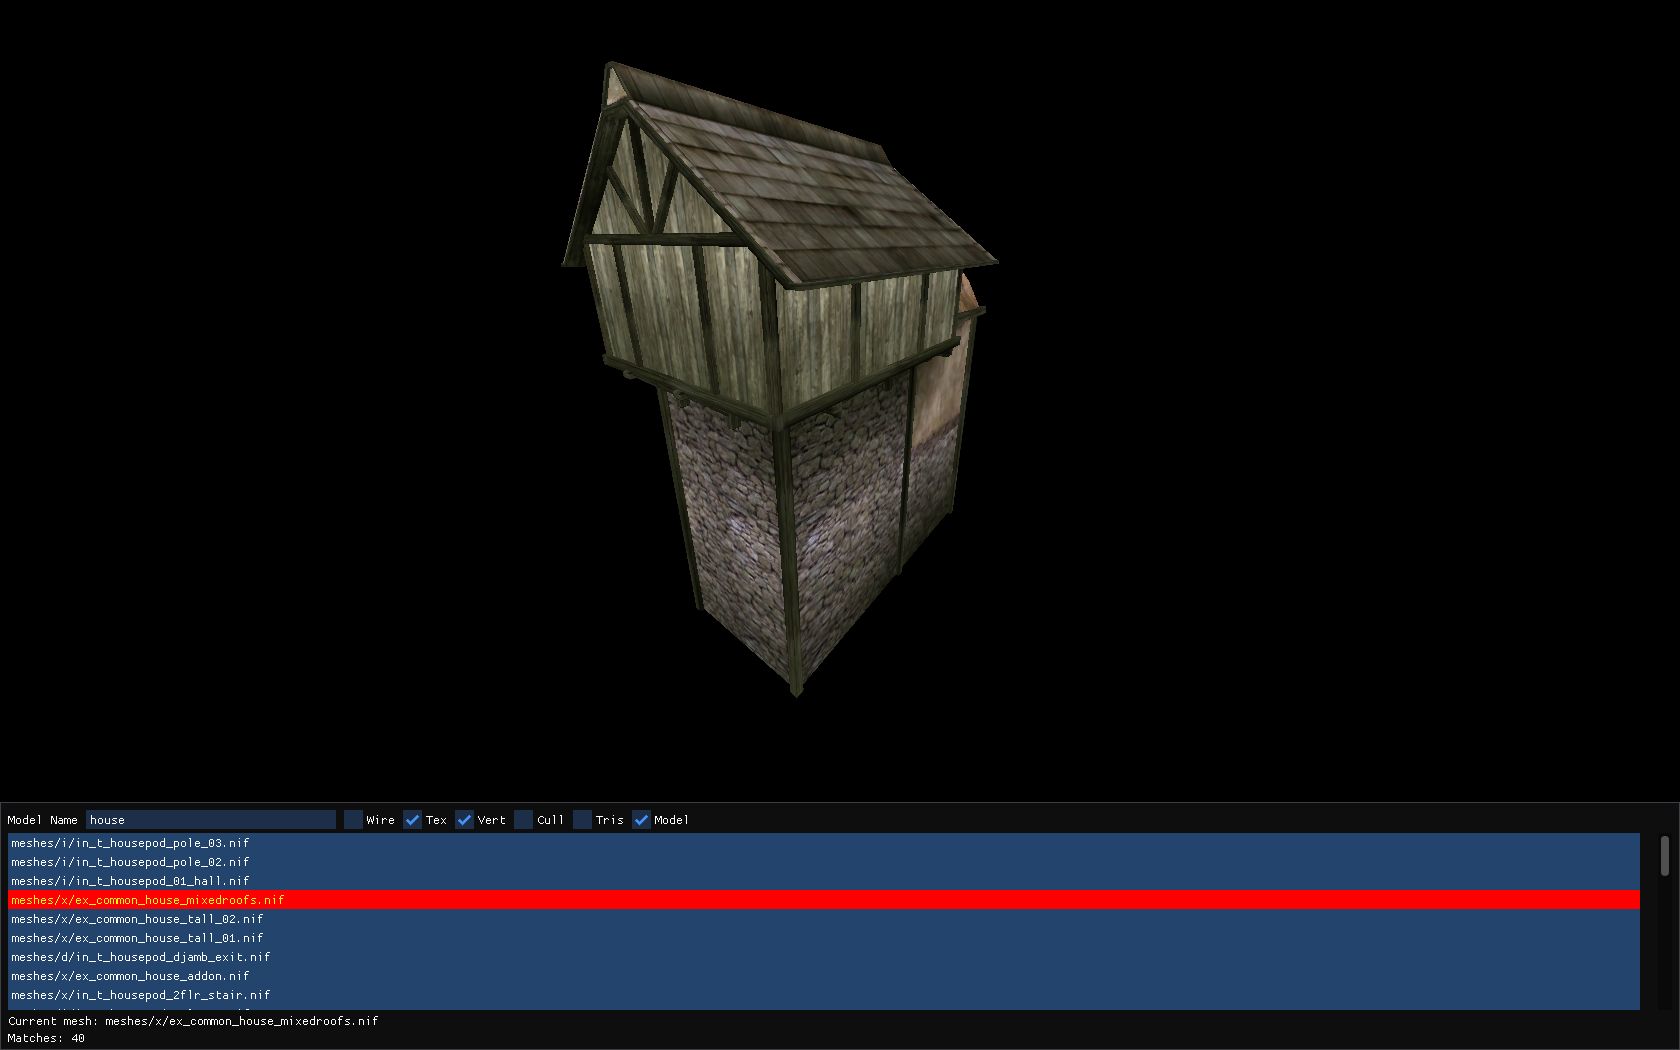
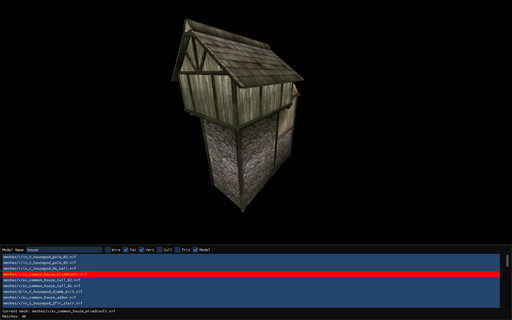
Morrowind Model Viewer
Jan. 2025
Model viewer for The Elder Scrolls III: Morrowind
 I first played Morrowind around the year 2004. It was a demo version that I remember quite fondly. I never got very far into the game, maybe as far as Balmora, but I had no real understanding of the game yet.
Fast forward to roughly 2022, and I re-played it again, several times in fact.
A little while later I became interested in the binary formats that games stored their data in, having just previously finished the Quake/Half-Life BSP viewer, so I decided to give decoding the .bsa format a go.
At first, I got as far as reading the directory structure of a .bsa file. This included the file names, and the data that they referred to. Rendering anything at all was still seemingly far away.
After a short break, I started poking around the NIF file format by examining random models in a text editor. Then, with the aid of a program called NifSkope, I slowly pieced together the binary format of the file. This included a lot of trial and error, but I got something usable at the end.
I should note that the parsing of the model file is by no means complete. For more complicated models that include geometry in different coordinate systems, things can visually break, but for most basic models, the parser is usually sufficient.
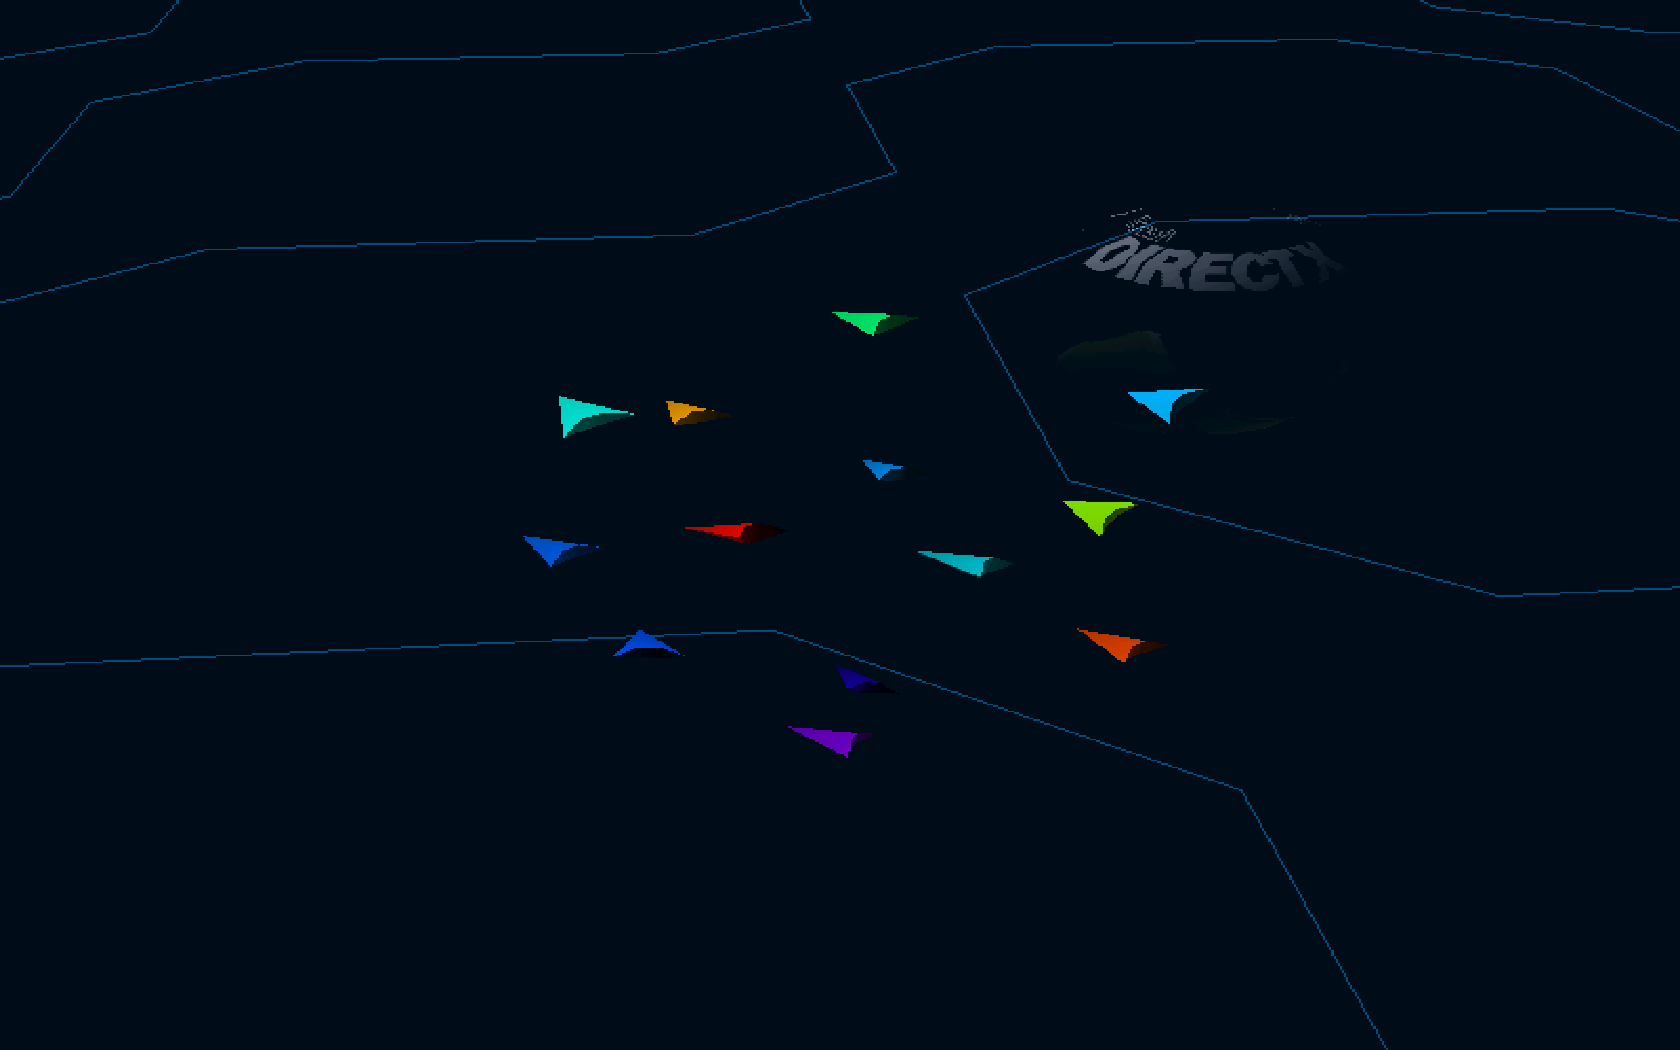
Boids Demo
Nov. 2024
Boids demo from 1998 running on D3D9
 The 1998 version of MSDN shipped with a number of demos that showed off the capabilities of Direct3D.
One of those demos that caught my attention was the Boids demo. To my surprise, it actually compiled and ran on a modern machine.
Years later, I decided to try and port the demo to D3D9 and D3D8 as a challenge. The bulk of the code is the same, save for the rendering calls which I mostly wrote simple wrappers for.
Looking back, the old way that DirectDraw and Direct3D were initialized was quite arcane.
I'm glad things got simpler starting with Direct3D8.
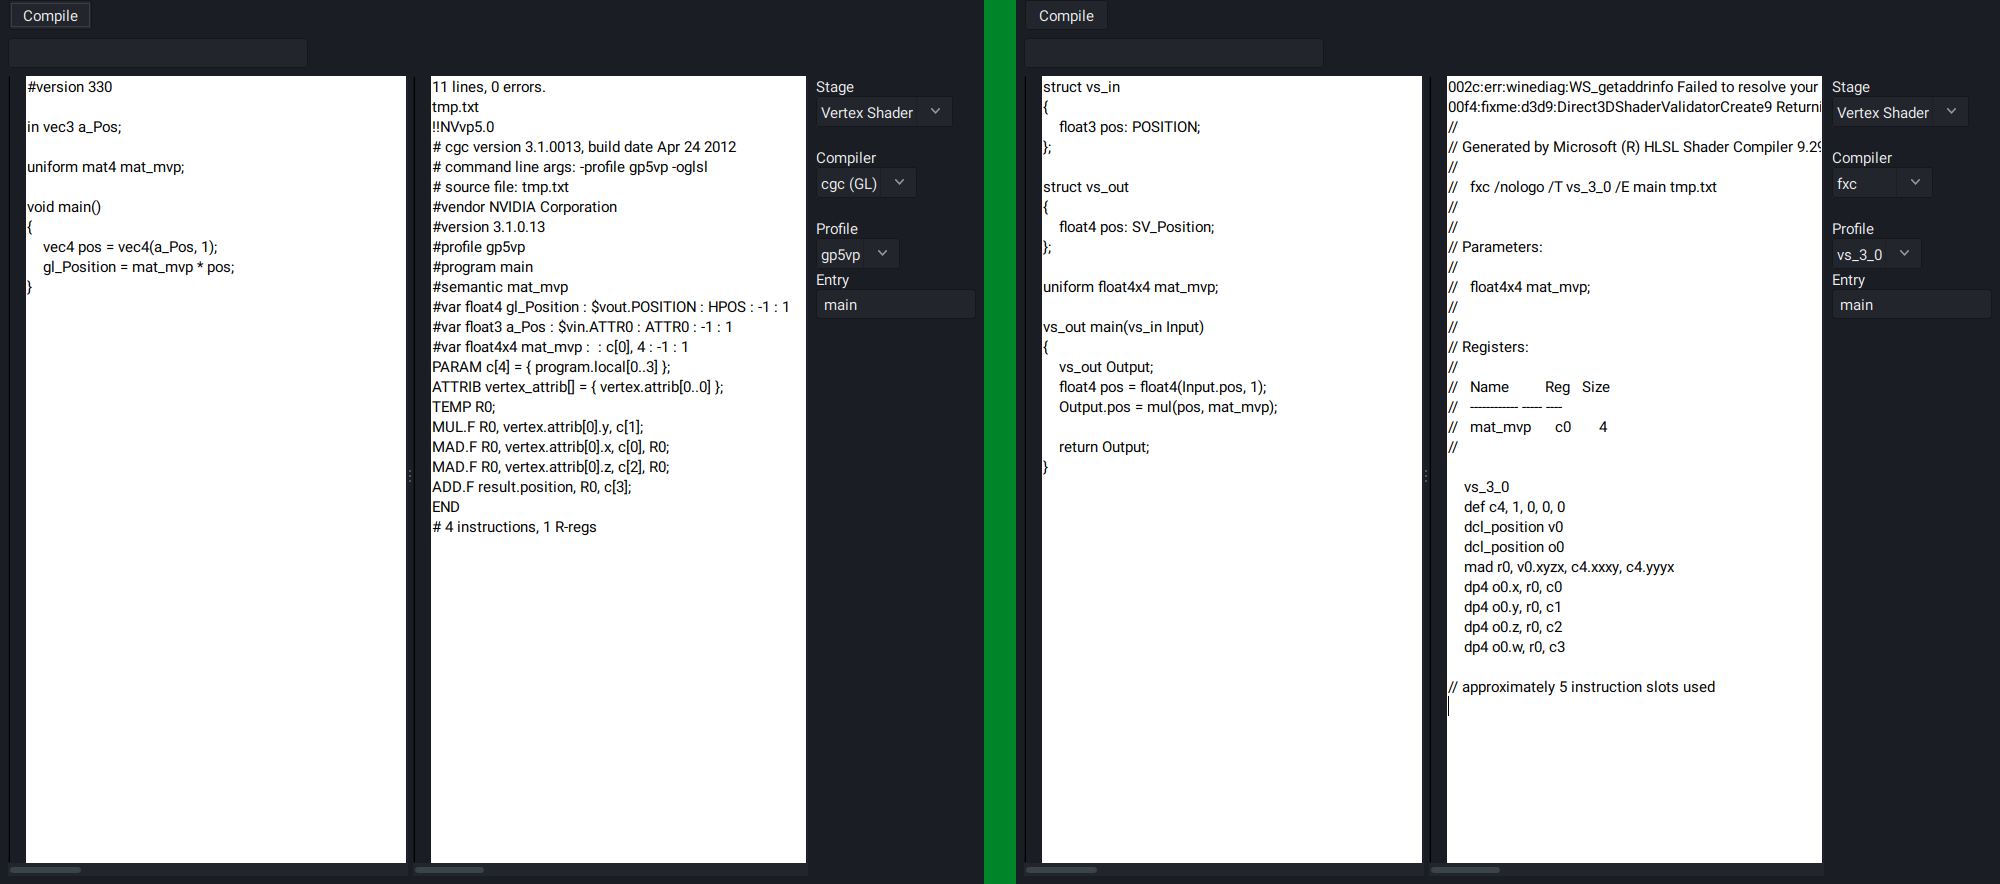
Shader Inspector
Nov. 2024
Inspired by AMD's GPU Shader Analyzer
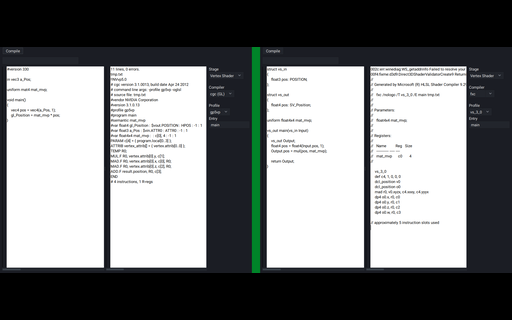 I learned GLSL before HLSL. After learning HLSL first starting with DX9, then DX11, I became much more aware of how the code I wrote would be translated into (psuedo) GPU instructions. By default, the GLSL compiler is built into the drivers of the respective graphics vendors, and there was no way to easily inspect the assembly output produced by the shader compiler.
I had then found that NVidia has a (now deprecated) tool called cgc, which was their solution for a cross-API shader compiler that works up to SM5 (GLSL4.2 or DX11). Using GLSL, it was able to produce ARB assembly output. Being able to test shaders out on the fly was something that I wanted to have, so I set out on writing a GUI tool that would display the assembly of compiled GLSL shaders.
It works by passing the source code in the left edit box to the given shader compiler, and displaying the output in the right edit box.
It's possible to select from a number of shader models (depending on the compiler).
The tool was then expanded to support HLSL on Linux by using Wine and installing the DirectX SDK to run the fxc shader compiler.
Unfortunately, cgc does not support #version430 shaders that use the shader storage buffer object extension, so some manual manipulation is required to change SSBO objects into Uniform Buffer objects for the sake of getting the shader to compile. However, versions #110 to #420 work great, and a number of extensions are also supported.
Since writing this tool, I developed a much better understanding of what my GLSL shaders were actually doing.
As a side note, at least as of 2026, it's possible to obtain ARB assembly output from shaders on NVidia cards by using the following sequence of code.
GLsizei length;
GLsizei binary_format;
int i;
unsigned char *binary_buffer;
glGetProgramiv(program, GL_PROGRAM_BINARY_LENGTH, &length);
binary_buffer = malloc(length);
glGetProgramBinary(program, length, &length, &binary_format, binary_buffer);
for(i = 0; i < length; i++)
{
int ch = binary_buffer[i];
if(isgraph(ch) || isspace(ch))
{
putchar(ch);
}
}
This outputs the assembly of the entire program. If a shader consisted of a vertex and fragment shader, you would get both.
The solution is not perfect, as there are occasionally some junk characters, but it's good enough to get an idea of what's going on in your shaders.
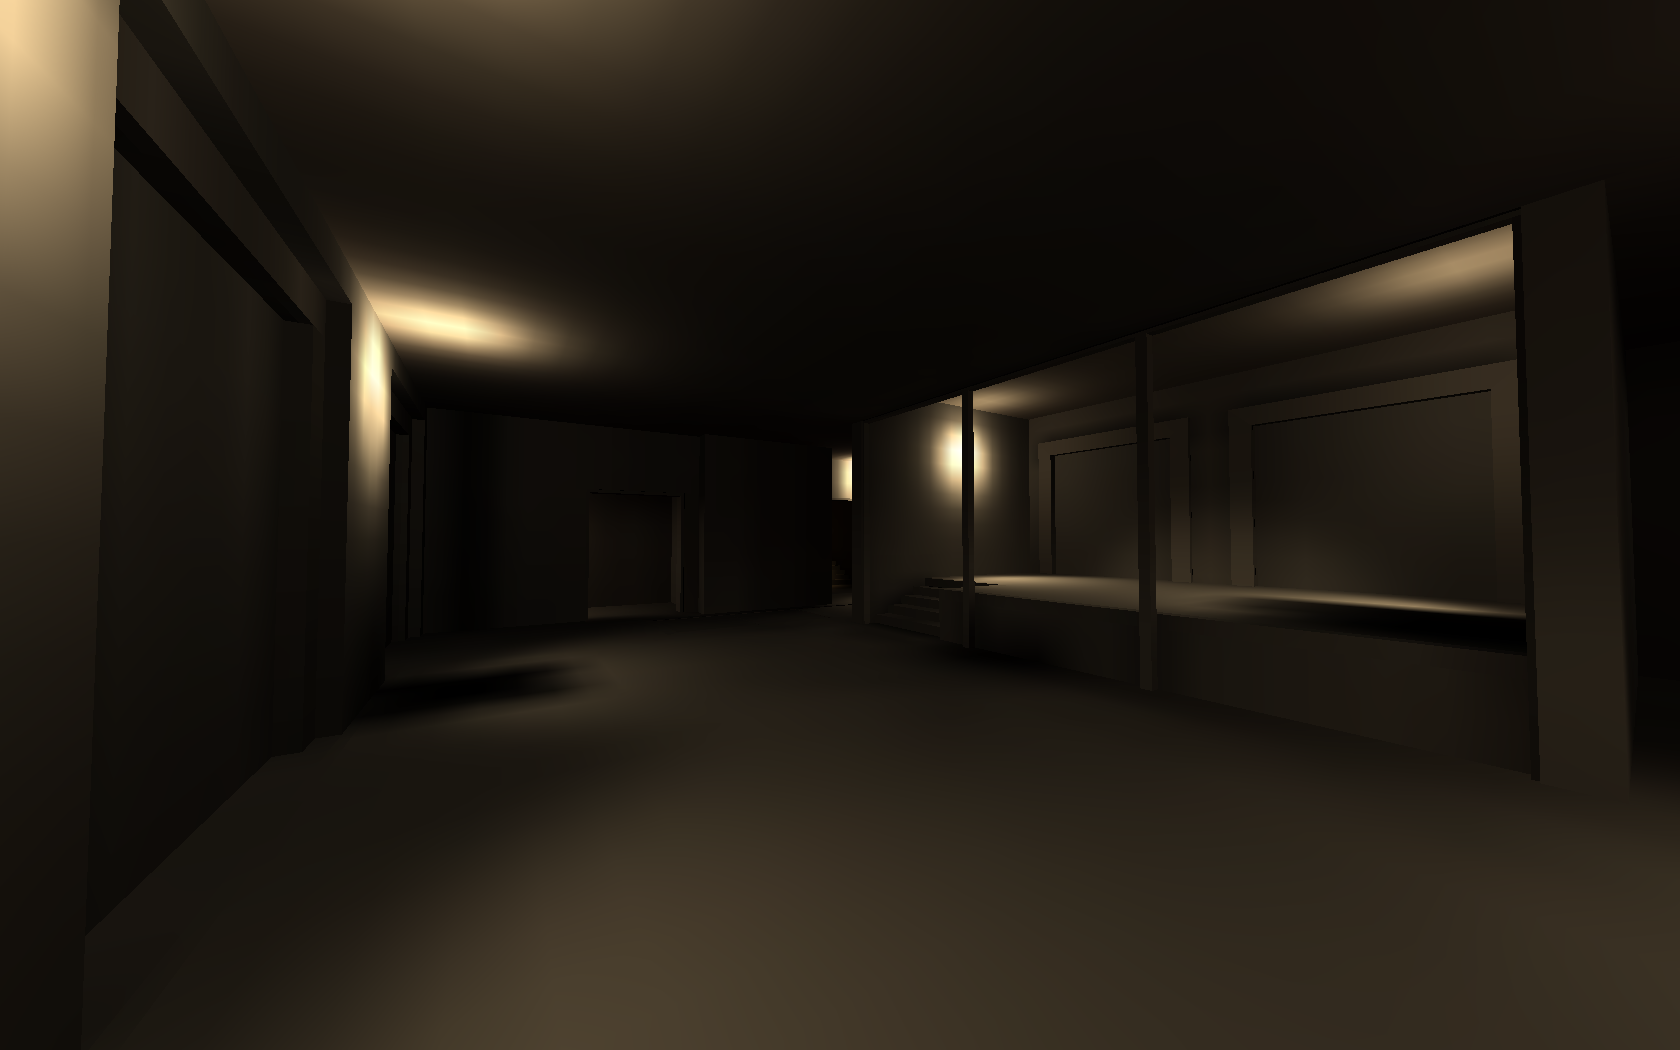
Quake 2 BSP Renderer
Nov. 2024
Lightmapper and renderer for the Quake 2 BSP format. Level designed in Trenchbroom. The textures are from Half-Life
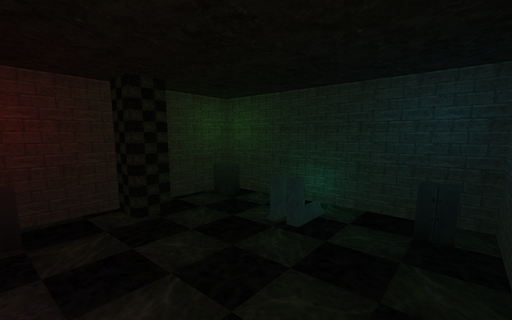 In recent times, I have found myself really appreciating the look of lightmapped games, or rather, games which primarily rely in lightmapping as their means of illumination. For lack of a better description, there is something rather cozy and comforting about the effect that this approach produces. Many games today (2026) still use lightmaps as part of their lighting, but they are just one of many, many different techniques applied to produce the final scene. Things used to be simpler :)
The actual technique has eluded me for a number of years, but I had gathered enough information from various articles to attempt this in my own code.
Originally, I had intended to create a dungeon-crawler style game using Trenchbroom and the Quake II map format, but the lighting turned out to be far more difficult than I had anticipated. The initial effort wasn't too bad, and after making quite a lot of progress, I got stuck at shadows, and BSP collision detection respectively, and my motivation to continue slowly dwindled. Even so, I learned a lot doing this, and used some of what I learned in subsequent projects.
Some favourites of mine in no particular order:
* Half-Life I
* Unreal
* Arx Fatalis
* Dungeon Siege I
* Gothic I
References I used:
https://www.flipcode.com/archives/Light_Mapping_Theory_and_Implementation.shtml
https://www.flipcode.com/archives/Lightmaps_Static_Shadowmaps.shtml
http://polygone.flipcode.com/tut_lightmap.htm
* Original link to polygone.flipcode is broken, the link redirects to the wayback machine.
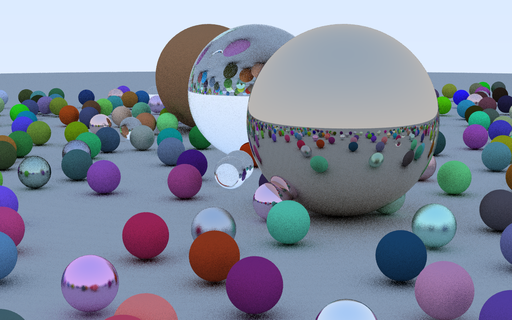
Environment Mapped Teapot
Nov. 2024
All shaders were written in vs_2_0 and ps_2_0 assembly, then ported to HLSL
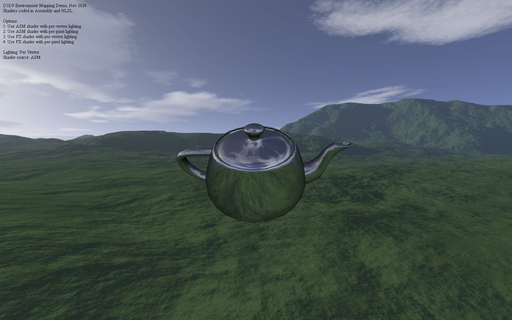 After scanning through the ShaderX and ShaderX2 books, I was quite surpised to see just how many of the shaders were implemented in pure D3D assembly. Although, it is not entirely unexpected given that, just as many computer programs were once written in assembly language for performance reasons before C compilers became good enough to (mostly) replace assembly, so too, were shader writers going through a similar process with shader compilers.
Given that by the time I started writing shaders, GLSL and HLSL were already very well established, I could not see myself writing anything too complex, but the books did inspire me to at least try implementing some minimal effects such as environment mapping and basic directional lighting in shader assembly.
These days, shader compilers are quite good at certain optimizations, and in particular, dead-code elimination, but it was a fun journey to go back to the older way of doing things, even if it was for a simple demo.
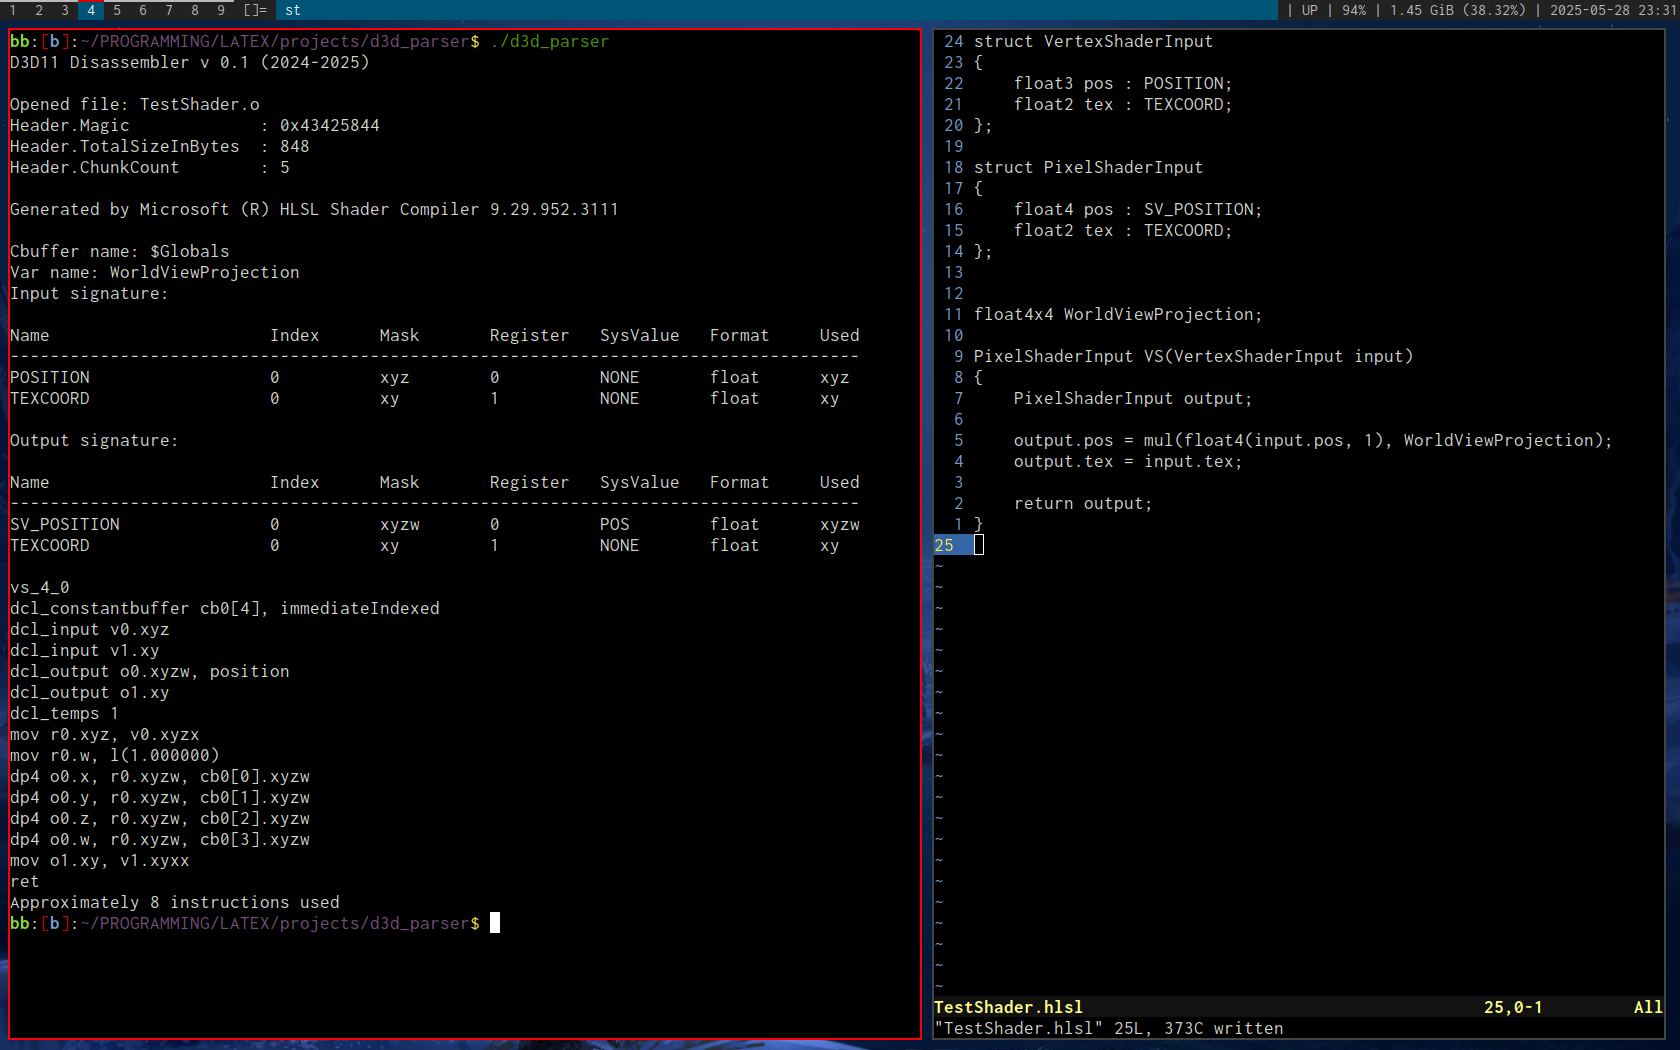
DXBC Disassembler
Nov. 2024
Based on this D3D bytecode article by Tim Jones

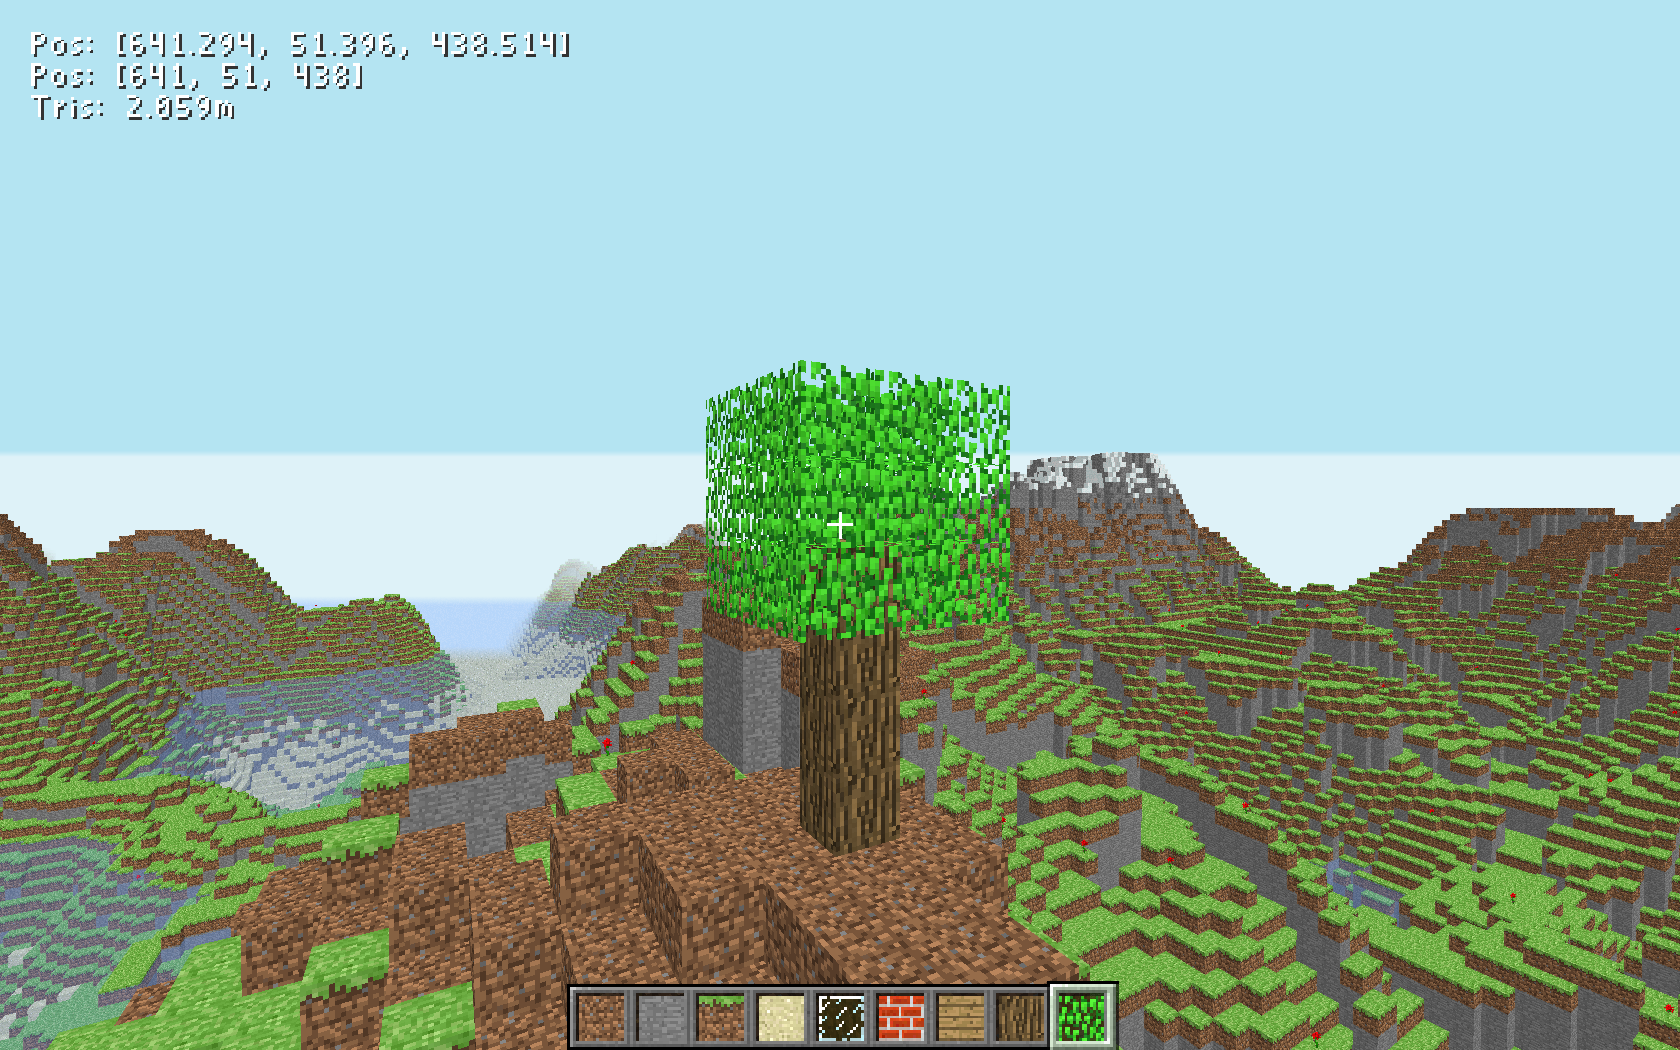
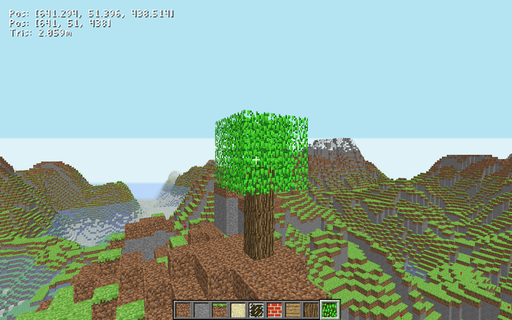
Minecraft Clone
Oct. 2024
Inspired by this video on Minecraft by Coder Space
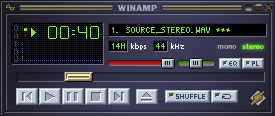
Winamp Clone
Aug. 2024
Heavily inspired by Ryan C. Gordon's sdlamp playlist
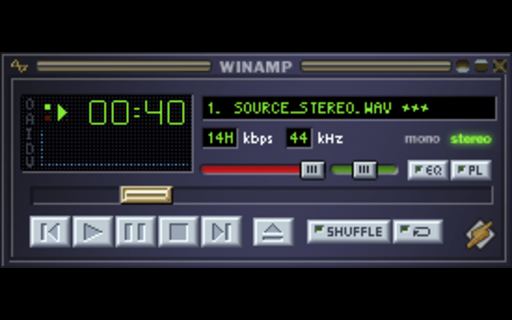 In 2022, Ryan C. Gordon (known as one of the developers working on SDL, among many other things) published a series of videos in which he developed a Winamp style media player using nothing but SDL and a few auxillary libraries.
After having my own go at several very primitive audio players, this series was the one that inspired me to try something similar.
I also chose C as the development language, which posed some interesting challenges. After the interface got sufficiently complicated enough, I saw no way out other than to implement my own GUI library for buttons and sliders. Effectively this was an OO approach without the C++ class heirarchy or inheritance. Well, there was a form of inheritance, it was just explicit. For example, a slider could contain a button struct. This was the first time I implemented a properly working GUI library, and it nice writing everything from scratch and not having to abide by the whims of another GUI toolkit.
I deviated a little from the original design and went with OpenGL as the renderer, which gave me more freedom to draw other primitive types, such as the waveform below the main display.
I also added SDL_sound and physfs, both by Ryan C. Gordon.
SDL_sound can open and play many different audio formats, whereas physfs adds support for opening various archive formats and creating a single virtual filesystem in RAM out of them. In the case of this project, I used it to open Winamp skin files, which are just zip files.
After finishing the bulk of the work for the main program, there was still the question of adding more windows, such as the playlist window.
SDL does support multiple windows that you can distinguish by using SDL_GetWindowID(), and most events have a windowID member that corresponds to this value.
I had the idea of emulating the Windows operating system in a way - Create multiple windows, and by their window ID, call a designated window procedure for each window, which would in turn serve as its message loop. As an API, SDL only has one event loop, so the events would need be forwarded to each window manually.
I wrote this bit of abstraction and it actually worked exactly the way I intended it to, but unfortunately burnout got the better of me and I stopped most work on the project at this point. I think the primary culprit was the headache that was managing multiple OpenGL contexts for multiple windows.
Knowing what I know now, I would probably write some sort of command list API to queue up rendering commands, and then consolidate them on the main thread and render each window in sequence.
That said, a decent numbers of features have been implemented in this base version, and it can certainly work as a reliable single-track audio player.
PS: I highly recommend watching the first few videos of Ryan's media player playlist if you're new to SDL. There's lots to learn. Even if you're a seasoned user, the videos are well made and enjoyable.
Video Player
Jul. 2024
Inspired by Joel Yliluoma's video on Bink decoding. This player supports all formats supported by ffmpeg/libavcodec
 A lot of games from the late 90s to early 2000s used the Bink video format developed by RAD Game Tools.
This is quite a nostalgic format to me for whatever reason, most likely because quite a few games I've played used this format for their introduction and cutscene cinematics, and it was very characteristic for being used to play back pre-rendered 3D animations with a very particular look and feeling to them.
One day I had the urge to learn how to play this format back. Thankfully, Bisqwit had a video on this topic that can be found here: Decoding a BINK video using libavcodec (remastered).
I used C++ and libavcodec (which is used by FFmpeg) to decode the video and audio streams, and played them using OpenGL for the video stream, and SDL2's audio API for the audio stream.
At first, I just had the video stream being decoded, and it was only able to play back Bink files. Eventually, I expanded this to play back more formats that libavcodec has built-in support for. I then added support for sound playback by opening a second stream dedicated for audio. The result is a general-purpose video player. One thing to note is that it's using CPU decoding only, so the maximum watchable video resolution (without stutters) will depend on the CPU speed. On a 3.1 GHz CPU, a 1920x1080 video is just about watchable, with occasional stutters.
There is one unfortunate bug however. For all formats except Bink and Smacker (another format by RAD Game Tools), there is a ~2 second delay between the video and audio, and to this day, I have no idea why. It's a bug I've left in for the time being, seeing as I don't intend to release this player to the public.
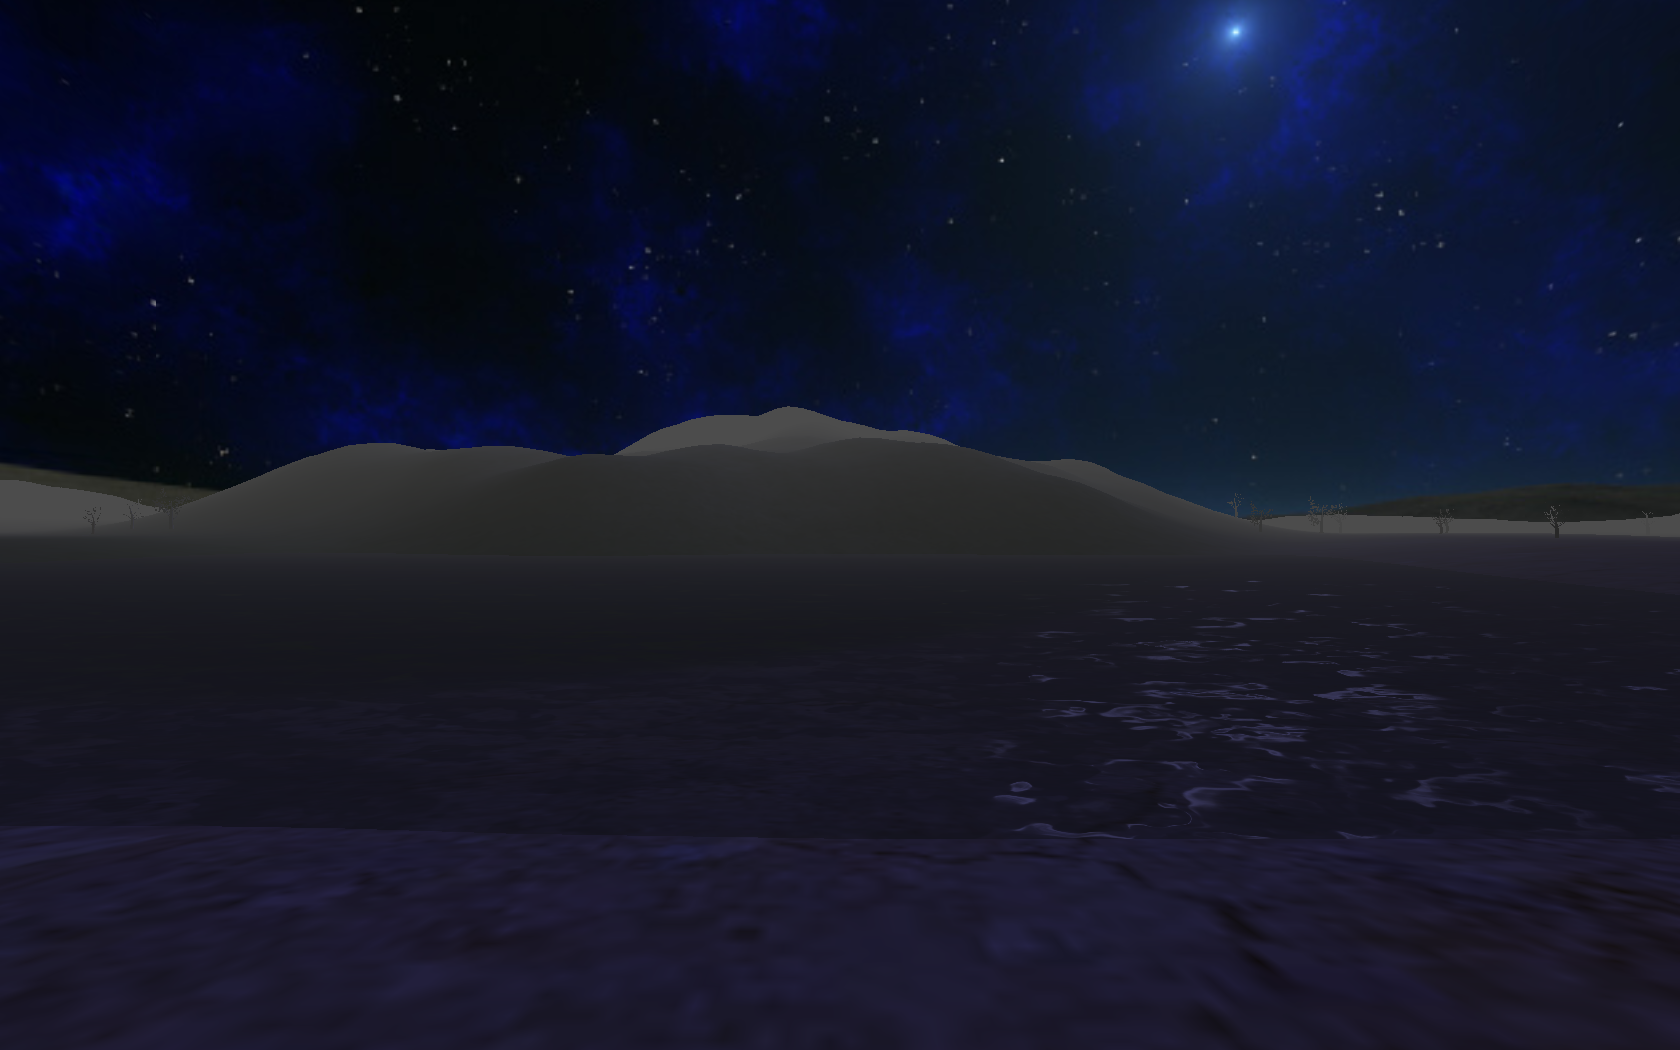
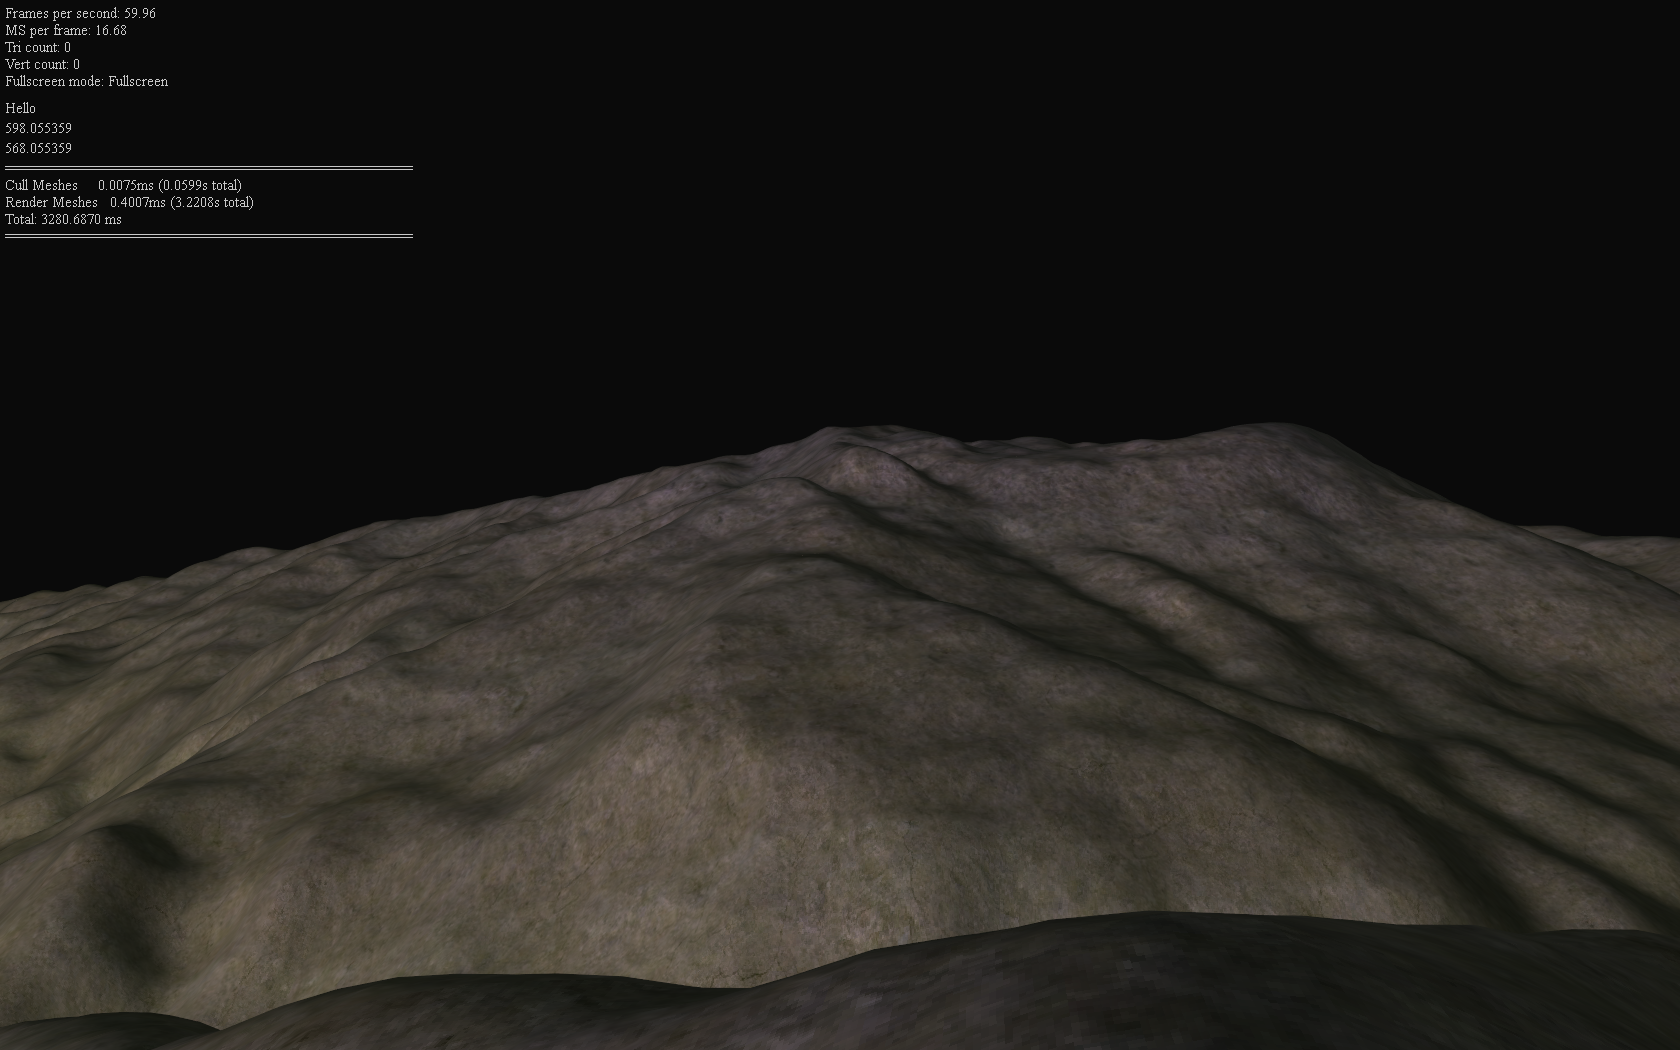
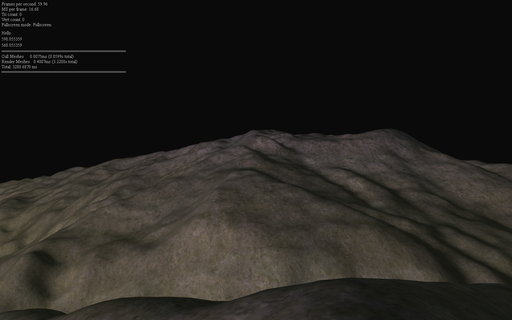
Vulkan/GL Comparison
Jun. 2024
ad_mountain.bsp from the Arcane Dimensions map pack
 Vulkan is often regarded as having superior performance over OpenGL. I wanted to test this for myself, so I wrote a program that renders exactly the same geometry, in exactly the same way, and uses the same shaders.
I used Quake levels as the test geometry, and simple flat shaded lighting with a single point light at the player's location, and a directional light based on the player position.
The plan was to make a common API between Vulkan and OpenGL so that logically they behaved in the same way. Then it was just a matter of implementing that API.
The rendering requirements here were quite simple, just a single glDrawElements / vkCmdDrawIndexed call that renders the entire level.
After doing all of the necessary work, I was surprised to find pretty much no percievable difference between the two APIs. Most likely, it was because I'm was not spending a lot of time in the driver, and the overhead is very minimal in either case.
So the takeaway is the following:
If you're writing a game that does not demand high performance rendering, OpenGL is more than sufficient.
When performance does come up, using OpenGL 4.5 features such as indirect rendering and storage buffers allows the programmer to make those optimizations where needed.
Combine that with DSA and bindless textures, and suddenly writing GL code is a lot more pleasant.
I think for simpler renderers, OpenGL is still the way to go. There is the matter of multithreading, which I still haven't tried with Vulkan. That could potentially be one area where things are a lot easier.
I am also sure that Vulkan can outperform OpenGL in certain workloads given equal attention to optimizing both code paths.
I just haven't had those performance bottlenecks come up in my own programming yet.
Regarding the more advanced comparisons that one may find on the web, related to my point above, it is often not very clear how much effort was actually spent making the usage of either API performant. I think that could be something worth investigating as well one day.
Below are the line counts for both implementations (including comments and whitespace)
Line counts obtained with wc -l
Total OpenGL lines (Window creation (GLFW) + renderer)
244 r_gl.cpp
244 total
Total Vulkan lines (Window creation (SDL / GLFW) + boilerplate + renderer)
573 r_vk.cpp
1706 vklib.c
247 vklib.h
2526 total
Chip-8 Emulator
Mar. 2024
SuperWorm V4 by Revival Studios
 This initially started out as a challenge by one of my good friends, who at the time had recently implemented their own version of this emulator.
Raytracing Weekend
Mar. 2024
Raytracing in One Weekend by Peter Shirley
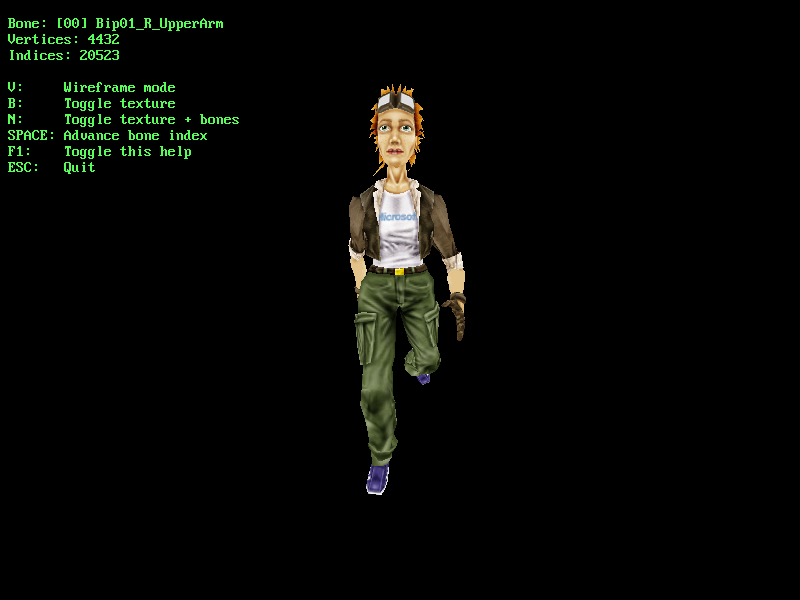
Skeletal Animation
Jan. 2024
Based on Etay Meiri's OpenGL skinning tutorials
 An example of rendering a 3D model that uses skeletal animation. The program is based on Etay Meiri's OpenGL skinning tutorials.
Done in C++ using OpenGL and SDL2.
I also built a small level using Trenchbroom. I used to play Everquest at some point, and the design is intended to resemble many of the castle gates featured in the game. I was going to have a ramp behind the gate leading down to some sort of dragon layer, but never got around to modeling it.
The Assimp library was used to load the model and the level.
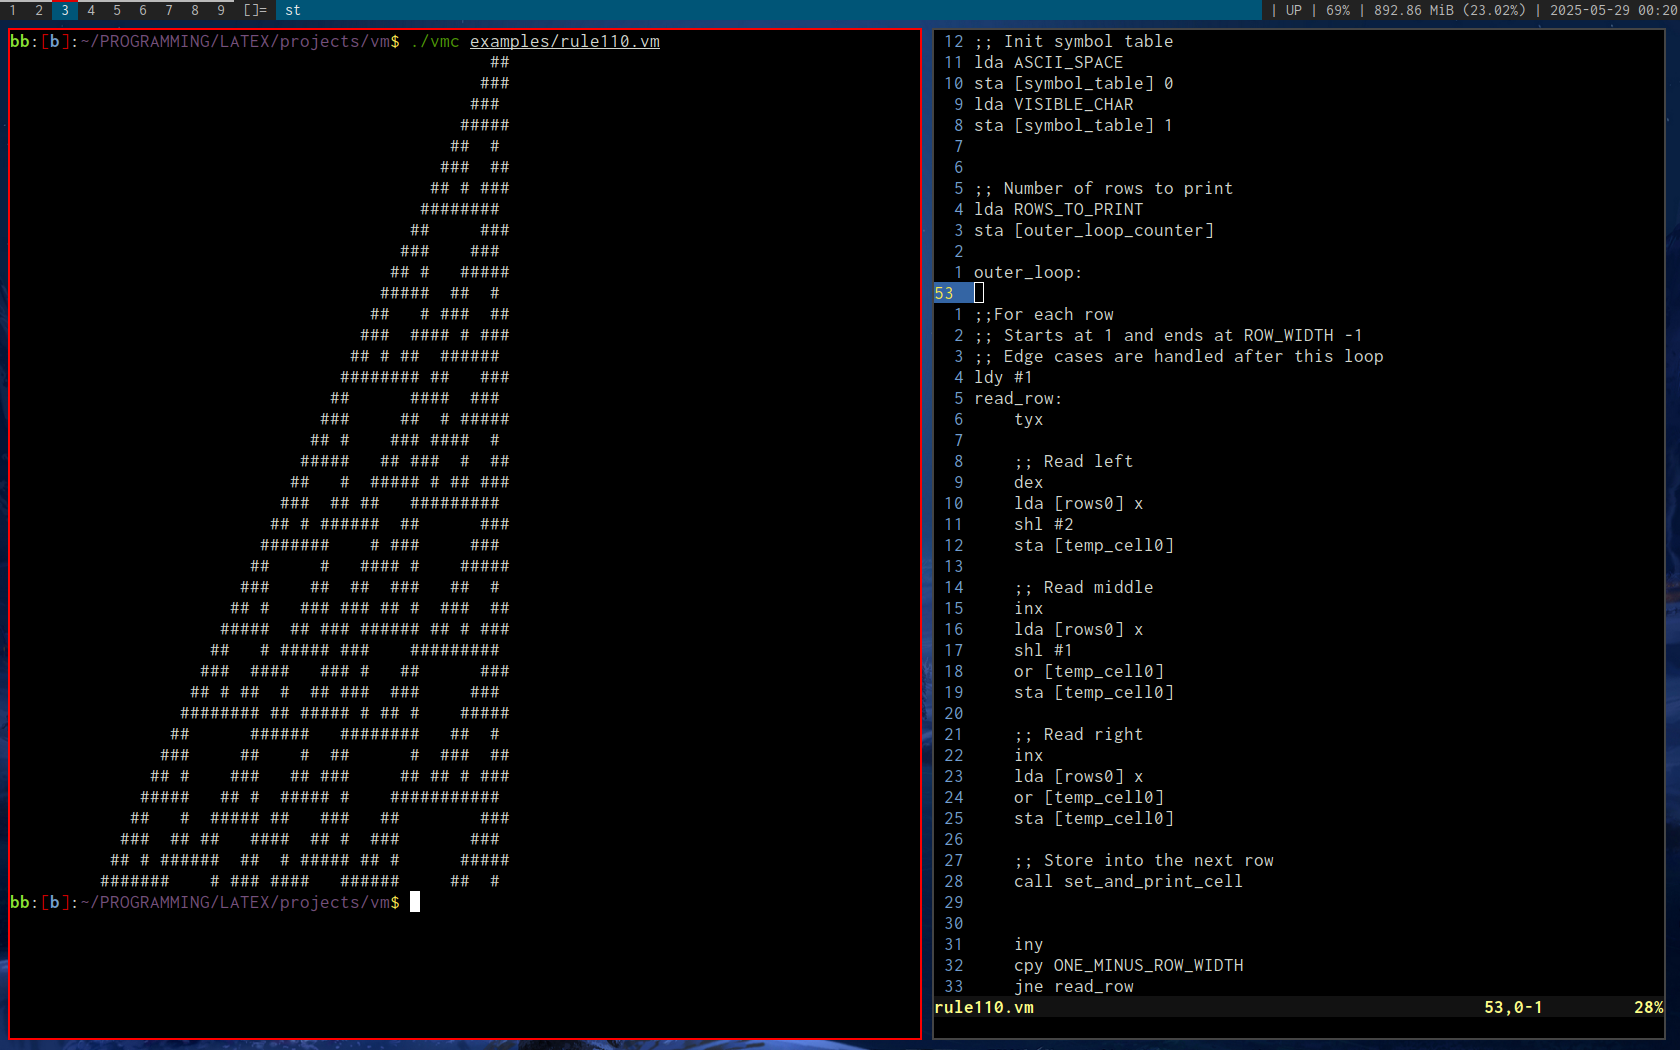
Virtual Machine
Nov. 2023
Rule 110 cellular automata by Stephen Wolfram
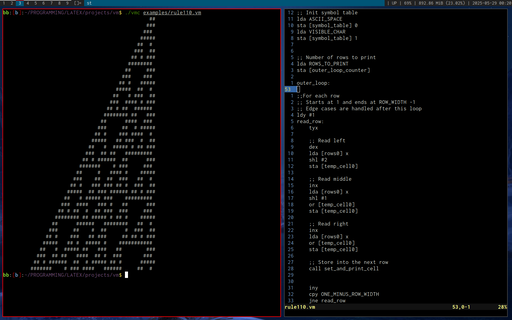 A custom programming language based on a hybrid of 6502 and x86 assembly.
After many failed attempts at creating a programming language, this was my first real success, in that I was both able to write a parser and interpreter that executed real code. The key difference between this and my previous attempts was that I started small. Previously, I had spent far too much time optimizing the parser, when I had absolutely no running code examples to speak of (they were also assembly-like languages). I was doing things like benchmarking how quickly I could get the parser to run through a million lines of code, without ever being able to run or compile that code into anything meaningful. The speed was there, but at the end, I was too burned out on optimizations and gave up.
By limiting my initial scope to just a few instructions (if I recall correctly, CMP, JNZ, and DEC), I was able to produce a so-called minimum-viable-product that ran through the entire parser/intepreter cycle, and I was then able to iterate on the compiler and language development much faster than if I had done it in isolation as before.
More instructions soon followed, and I then began writing the software I wanted, and implementing new instructions to accomodate that software.
Rule 110 by Stephen Wolfram was a good test case which forced me to add a number of new instructions and addressing modes.
In brief, the language can best be described as having x86-like instructions and addressing ([] operators with register / address offsets), and 6502 register limitations (only 3 registers and a stack, as well as 64k of RAM).
Practically speaking, there is no real reason to limit the syntax to just three registers, as was done in the 6502, but, it does impose an interesting limitation and changes how one thinks about writing code.
Going back to the previous optimization topic, it turned out that just by following a simple approach, there was no practical need to optimize the parser. It was honestly more fast enough for anything that was required of it.
As an aside, even the interpreter is quite fast, given that I often coded the simplest and most obvious thing that came to mind, and spent minimum effort optimizing. In truth, the only thing I spent time on was implementing a buffered printf (Odin, the implementation language for this interpreter did not have a buffered print at that time, and was issuing a write() syscall on each print call).
Some time later, I coded up a transpiler that translated brain**** source code into a number of other languages (including this one), and this language's performance was actually about on par with Java! Granted, the JVM had absolutely no chance at JIT compiling the output of the transpiler, but I was surprised nevertheless.
Lessons learned: Building a minumum-viable product can be incredibly beneficial when done under the right circumstances.
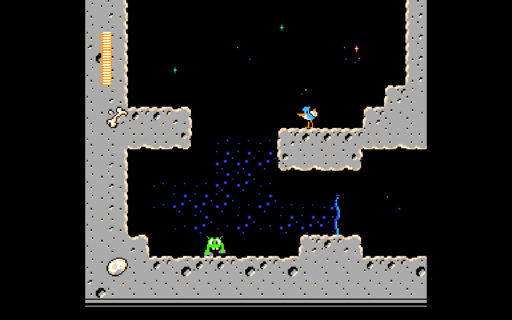
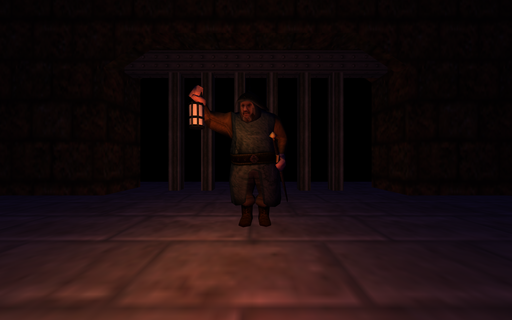
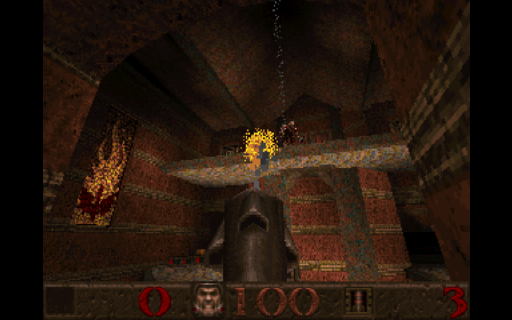
BSP Viewer (Quake, Half-Life)
Sep. 2023
Black Mesa Inbound (c0a0.bsp)
SoftQuake
Aug. 2023
Gloom Keep (e1m5.bsp). Link to this port
Doomfire (DOS)
Apr. 2023
Inspired by Fabien Sanglard's article on this effect
 I first learned about this algorithm in Fabien Sanglard's article. After implementing it for the desktop, I wanted to port it to DOS's Mode 13h.
Very quickly, I ran into performance bottlenecks when choosing a random number in SpreadFire().
This led me to come up with an optimized random number generator for this code. I was inspired by DOOM's approach of having a pre-calculated random number table, and randomly indexing into it.
So now, instead of this:
long Random = ((long)((rand() / (float)RAND_MAX) * 3)) & 3;
We have:
RndIndex = (RndIndex + 1) & 0xFF
long Random = RndLong[RndIndex];
RndLong is a table of random values with the (& 3) mask pre-applied.
RndIndex is seeded once per scanline to give the illusion of randomness, and is incremented each scanline pixel.
Reviwing the assembly language:
Listing 1:
call near ptr _rand
mov word ptr [bp-10],ax
fild word ptr [bp-10]
fdiv dword ptr DGROUP:s@+8
fmul dword ptr DGROUP:s@+4
call near ptr N_FTOL@
and ax,3
and dx,0
mov word ptr [bp-6],dx
mov word ptr [bp-8],ax
Listing 2:
mov ax,word ptr DGROUP:_RndIndex
inc ax
and ax,255
mov word ptr DGROUP:_RndIndex,ax
mov cl,2
shl ax,cl
les bx,dword ptr DGROUP:_RndLong
add bx,ax
mov ax,word ptr es:[bx+2]
mov dx,word ptr es:[bx]
mov word ptr [bp-6],ax
mov word ptr [bp-8],dx
So although Listing 2 appears to be longer, we avoid two functions calls, an fdiv, and an fmul.
As a result, the optimized code runs about 2x faster.
I highly recommend reading the article, as I did not explain the algorithm itself in this writeup.
To generate the random numbers, I used this 16-bit random number algorithm.
unsigned short seed = 10;
unsigned short RandomInt16()
{
unsigned short x = seed;
x ^= x << 7;
x ^= x >> 9;
x ^= x << 8;
seed = x;
return x;
}
D3D9c Demos
Apr. 2023
The first 18 chapters of Frank Luna's D3D9c tutorials. This image is based on Chapter 18 - Culling
 I don't remember exactly how or why I decided to learn D3D9, but somehow, I stumbled upon Frank Luna's D3D9c tutorials, and spent the next month or so going through them.
As I recall, I didn't actually install the D3D SDK properly, and instead used the headers and libraries provided by MSYS2 (a cross-compilation environment for Windows).
This meant that I had virtually no documentation, except the code that the headers contained, and the tutorial code. I remember development and debugging being quite frustrating in the beginning, especially because unlike OpenGL, D3D has this notion of lost resources which needed be reset whenever the window got maximized from a minimized state, or got set to fullscreen mode, or other combination of state changes.
I was also using the D3DX library as was done in the tutorials, which meant that those resources needed to follow a similar reset process. After some consideration on how to solve this, I just stored all of the resources in std::vectors containing an array of each respective type of resource. I had a separate array for sprites, textures, shaders, and fonts. In future attempts of these tutorials, I used a slightly fancier approach that used a base class with virtual OnLostDevice and OnResetDevice functions, and created inherited classes for each resource type that would call then its respective functions. This allowed me to have a single array for all D3DX resources, at the slight overhead of a virtual function call. I didn't know how to do this at the time, so I just made separate arrays and looped over each one manually as needed.
Regarding shaders, this was also my first introduction to HLSL, Microsoft's shading language. Coming from GLSL, and being quite accustomed to #version 330 to #version 450 features (roughly equivalent to DX10 and DX11), this was quite an eye-opener for me. Separate shader compilation was something I had never encountered before, and using FX files was also something new (I'll elaborate more on this later).
The tutorial used vs_2_0 and ps_2_0 shader models. I did not know it at the time, but these shader models are quite restrictive compared to what we are accustomed to these days (although for the time, I imagine that it did not feel as such, especially compared to the limitations of DX8). After getting to the 3D portion of the tutorial and trying to implement lighting in the LearnOpenGL style, I quickly ran into constant register limitations, after which I bumped up the version to vs_3_0 and ps_3_0, and stuck to that for the rest of the examples.
See the tables below for the pixel shader register counts:
Shader Model 2
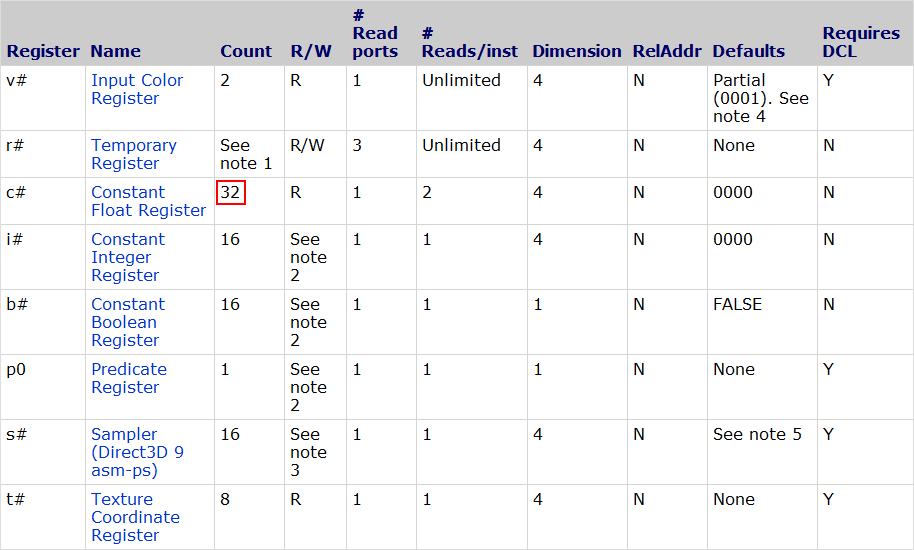
Shader Model 3
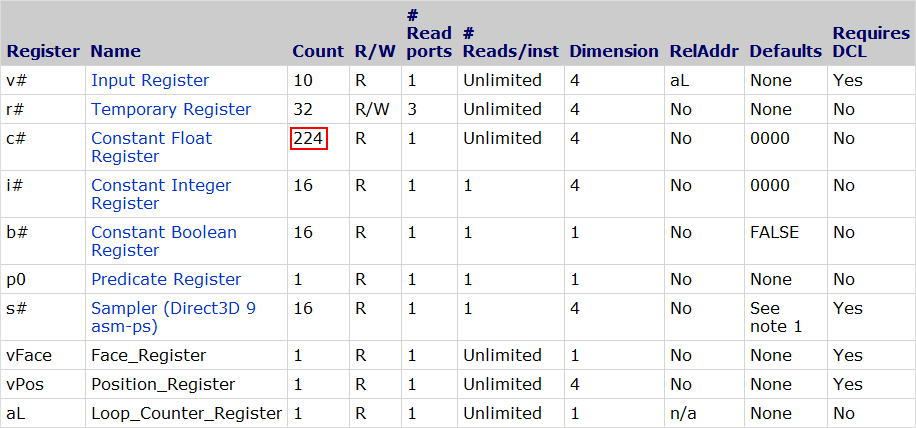
As we can see, there are a mere 32 constant float registers in the ps_2_0 model. It's worth noting that each register refers to a 4-element float. That is, even if we use a uniform float value consisting of a single element, unless the compiler is doing some magic for us behind the scenes (usually known compile-time constants), it will take up the same amount of space as 4 elements. This makes packing an absolute must when register limits are being hit.
On the other hand, the ps_3_0 requirements are much more relaxed, giving us a total of 224 constant float registers. Still a far cry from the thousands available today, but it's much more difficult to hit the register limit in standard shader programming.
Regarding the .fx files, this concept was also something quite new to me. Immediately, there are several conveniences that stand out:
- Including vertex and pixel shader code in the same file
- Supporting file #include
- Specifying the render state for each pass (.fx files only)
- Specifying the sampler state (.fx files only)
- Passing extra uniform parameters to the vs/ps entry points in the passes (.fx files only) **
At first, I thought that I uncovered some new hidden low-level way of directly controlling the GPU through shaders. Only much later did I realise that there must be a runtime that parses the .fx files (D3DX), and generates regular D3D function calls for each call of the Shader->Begin() / Shader->End() and Shader->BeginPass() / Shader->EndPass() pairs. I confirmed this later by inspecting the output in PIX, another tool that I did not start using until months after this series of tutorials was completed.
** From past experiments, it seemed to me that these uniform values sometimes generated flow control / conditional assignment instructions. However, some simple tests I just performed indicated to me that the shader compiler was able to optimize these into constant expressions. More testing will be needed. If we can actually pass compile-time constants and have the shader compiler optimize them, then this feature is much more useful than I had originally anticipated, and is more in line with what I expected the behaviour to be.
My initial impressions of HLSL based on (partially) completing the aforementioned tutorial series were quite good, and I've since borrowed many ideas from the FX files in the way I structure things in my renderers.
As we can see, the team responsible for the HLSL language really tried to include as much as possible to make working within the environment as seamless as can be. It is not for naught that I've heard the D3D9 API being reffered to as as the kitchen sink API. With the base D3D API along with the D3DX helper functions, there really is a lot in there. Again, coming from GLSL, it's not that these features are not possible to implement on top of GLSL, but it's that they would require writing an extra parser, as well as needing to include runtime support. Multiply that by hundreds or thousands of teams, and you would have a lot of code duplication to support effectively very similar feature sets. However, the benefit of GLSL is that it has very little language support for extra features (other than extensions), meaning that customizing the language to one's own preferences is a lot easier.
For my later OpenGL / GLSL programs, I ended up writing an #include directive pre-parser in Odin and C++. It's one of the most useful features the language can have, in my opinion, and only with glslc/glslang did we get standarised support for it. There is also stb_include by Sean Barret.
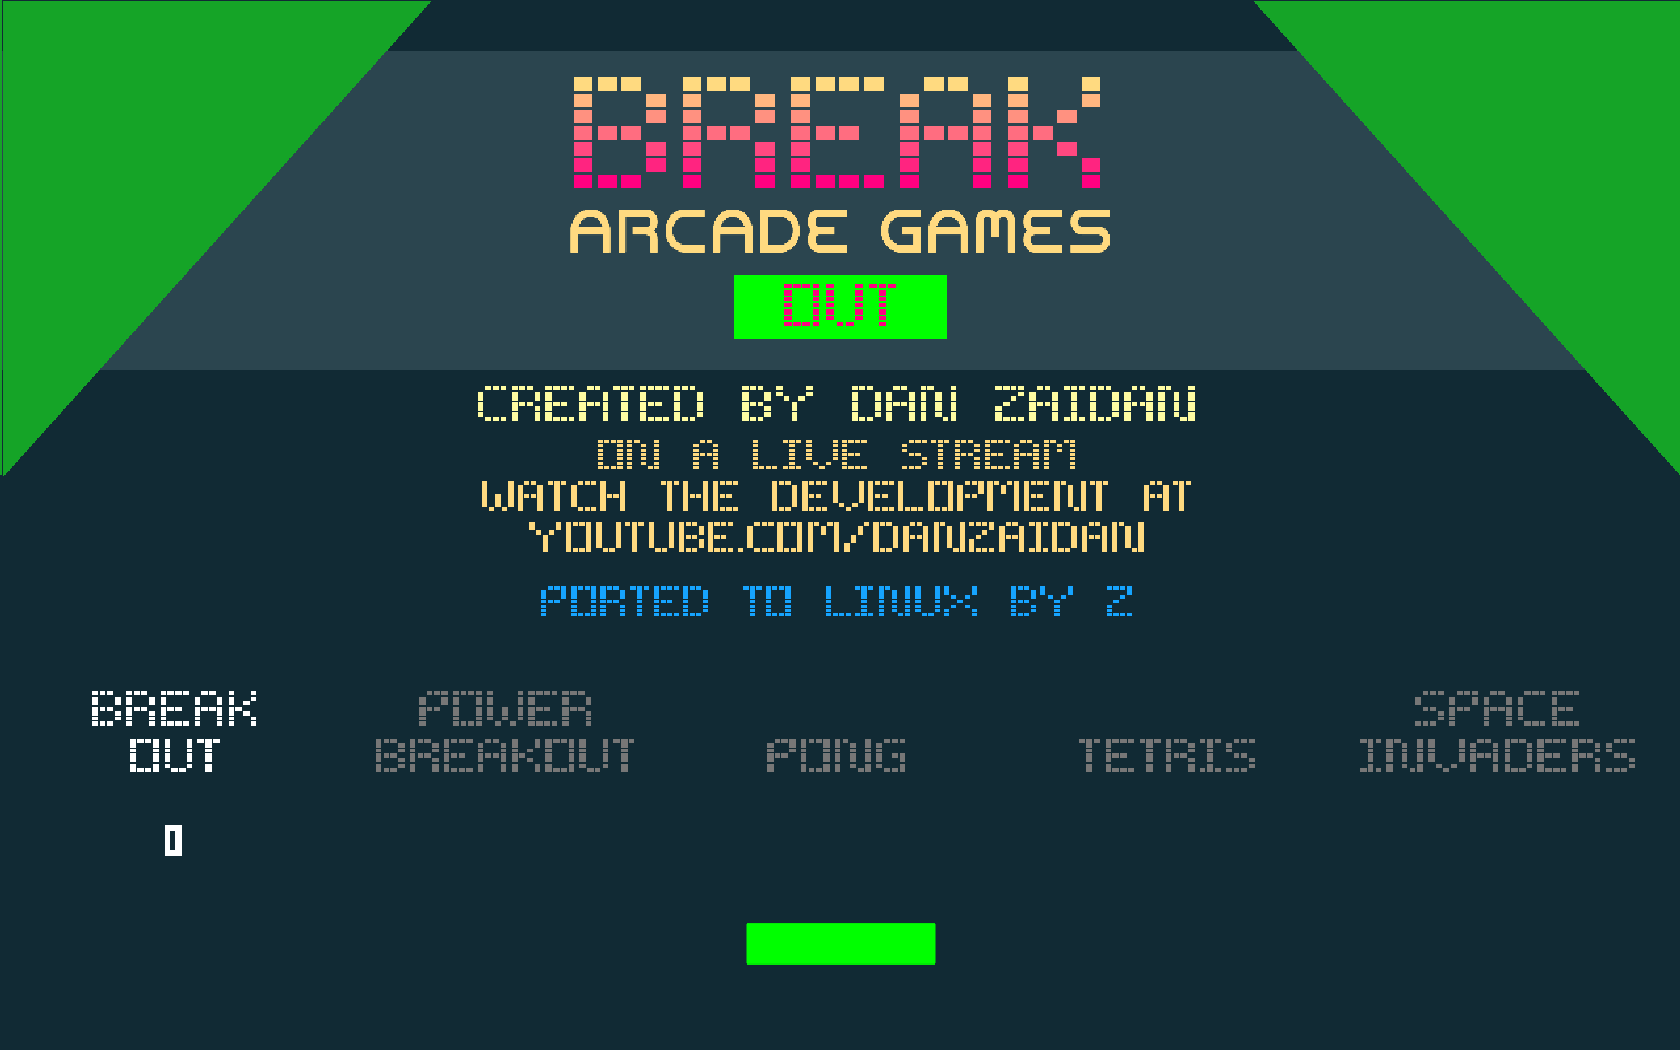
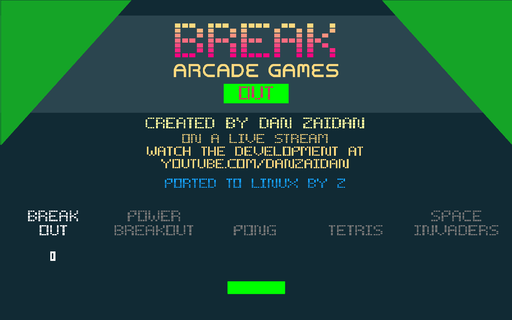
Break Arcade Games Out
Aug. 2022
The title screen of Break Arcade Games Out, originally by Dan Zaidan
 I was looking for a way to generate random numbers without using the rand() function, and I stumbled upon this video by Dan Zaidan (Implementing a Random Number Generator Algorithm in C (from scratch)).
It explored the xorshift algorithm by George Marsaglia. Many years later, this is still my PRNG of choice, and I wrote my own little library for it that I use pretty much any time I need something better than rand().
This video eventually led me into a rabbit hole of exploring game porting, and was the project that got me interested in porting software as a whole.
I started my initial port in December 2021. At this time, I had an OpenGL / GLFW, X11, and SDL2 port respectively. I didn't know what I know now about porting software, so every API / platform layer was pretty much written from scratch, with very little code reuse. However, this taught me a lot, and allowed me to explore different approaches in each port.
A few weeks after I began my work, I had a very crude port for each API, full of bugs and inconsistencies.
Sound was still out of the question at this point, as I had never worked with it before.
In April 2022, I started looking into getting sound working. I chose OpenAL as my API of choice, and slowly began uncommenting all of the sound code that I #ifdefed out initially. Again, I had no idea how to properly port missing API calls, so things like stubbing out function calls or making dummy interfaces for things one would implement later were foreign concepts to me. Instead, the code was a slew of #ifdef LINUX_NO_SOUND macros that I slowly had to untangle.
Eventually, I wrote a simple wrapper for OpenAL that worked with the existing sound API that the game used.
For SDL, I also wrote a similar audio layer using SDL_mixer.
ThinMatrix has a very nice introductory series to OpenAL which I highly recommend.
Dan, if you ever read this, thank you. I wish you all the best!
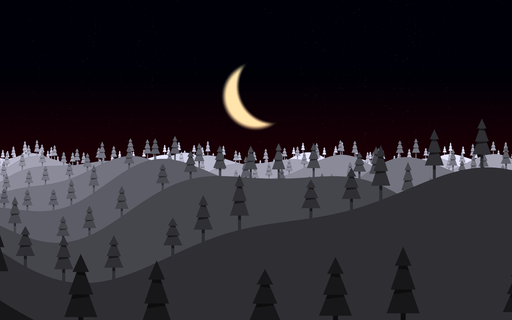
Shader Playground
Feb. 2022
A version of "Over the Moon" by Martin from The Art of Code
 In early 2022, I wanted to learn shaders. My only prior experience with 3-D graphics was using the OpenGL fixed-function pipeline, and, not knowing anything about 3-D graphics, it was very overwhelming at first. I recall spending about 4 to 5 hours figuring out how to move a 2D rectangle in the vertex shader (I had almost no knowledge about matrices or the concept of NDC space at the time, other than the fact that calling glOrtho() with a width and height could set up a 2D drawing area).
Suffice to say, a better way was needed.
I stumbled upon The Art of Code, which introduced me to shaders in a much better way than whatever I was doing previously (I honestly do not remember how I was approaching learning shaders before). The author of the videos (Martin) was using Shadertoy for his instructional videos, which provided an excellent way to iterate.
Desiring something similar offline, I wrote program that created an OpenGL window and rendered the output of the vertex and fragment shaders.
It also tracked the timestamp of the vertex, and fragment shader files respectively. Whenever the program detected that the timestamps were updated, it reloaded the shaders, providing an almost instant feedback loop for doing edits. On error, the error message would be displayed to the console, and the screen would turn red as a visual cue to indicate that something was wrong.
With the main program written, I was able to follow along with Martin's videos, enjoying many an evening coding along and exploring how shaders worked. At the time, I did not seek to completely re-create Shadertoy, so this version did not have things like image loading or some of the more advanced features. Just getting that feedback loop was enough for me. Naturally, this meant that some videos were not possible to complete, as they relied on things like loading external images, or reading from multiple framebuffers / textures, but the majority of videos that interested me were entirely doable from within this simple program.
Thank you Martin.
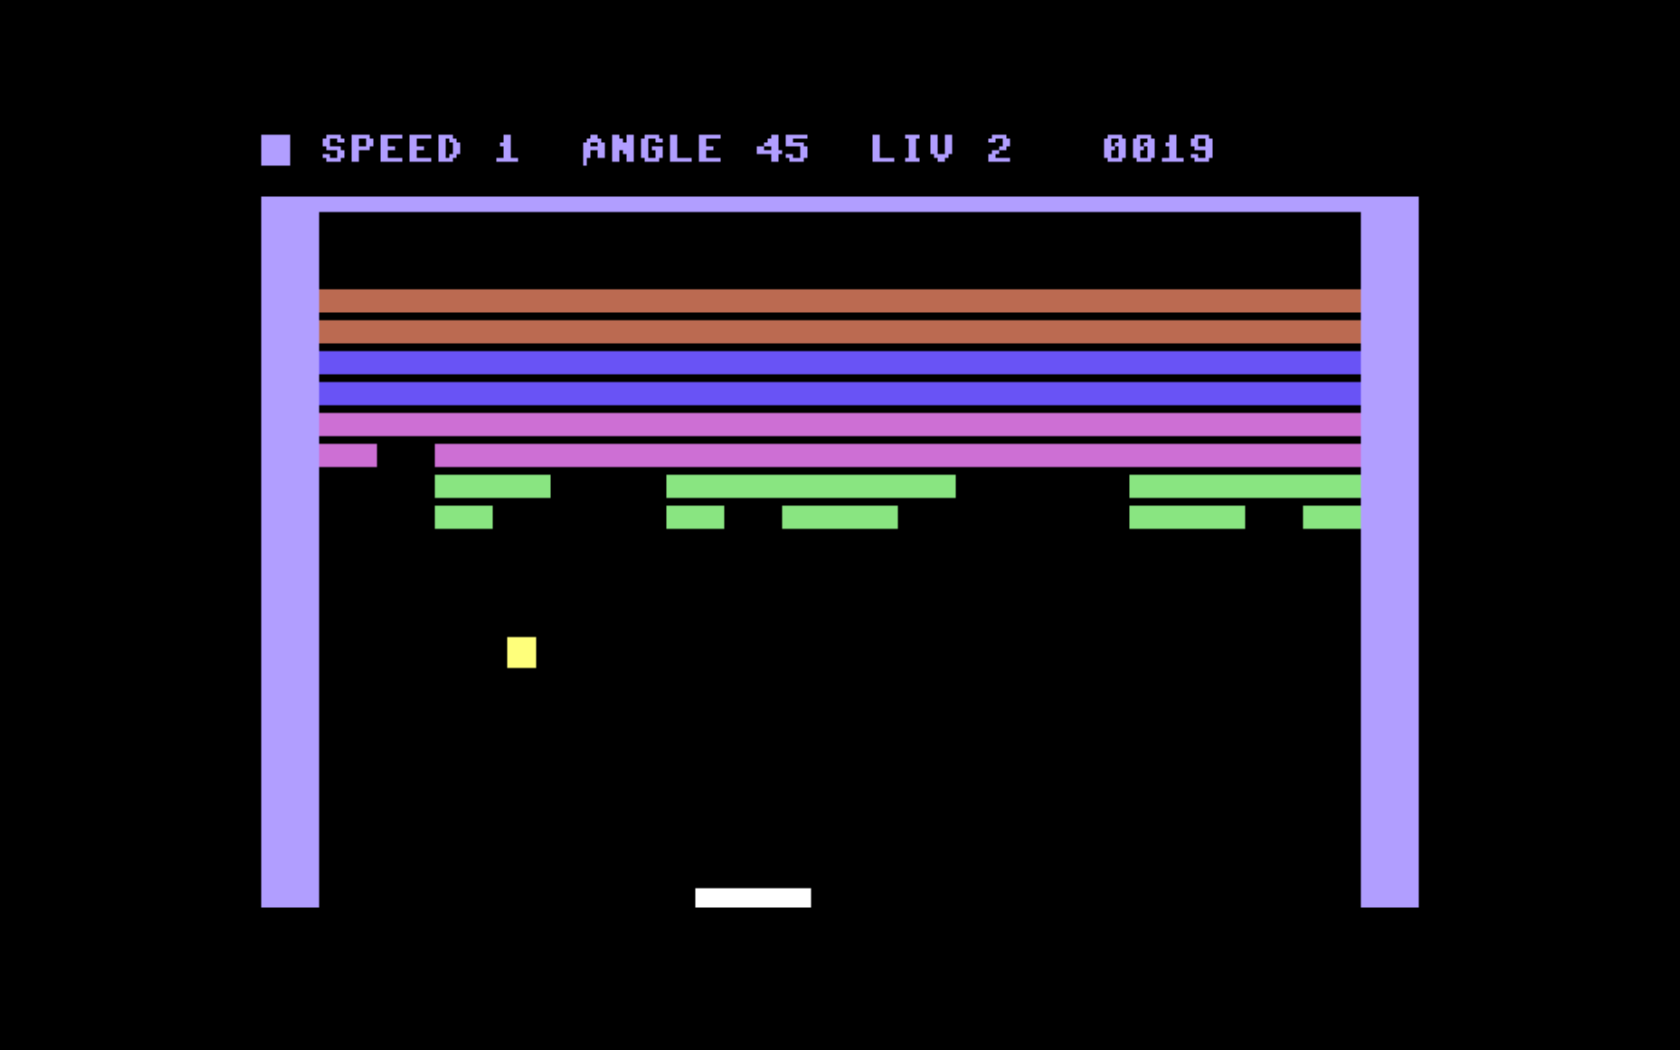
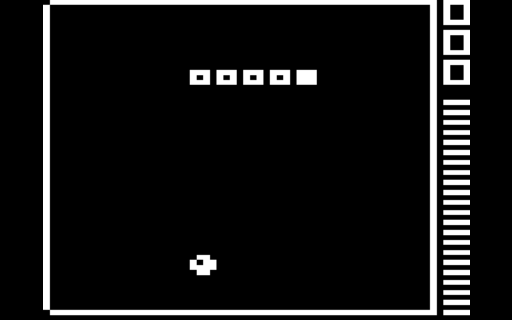
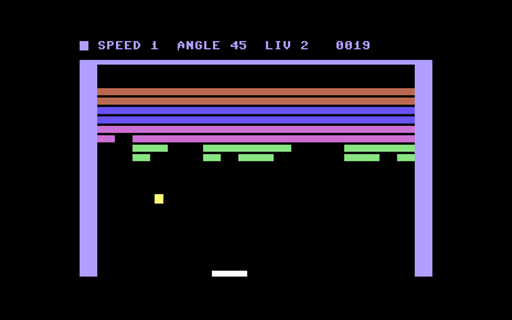
Breakout (C64)
Aug. 2020
A breakout game based on Atari's Super Breakout, written for the Commodore 64 entirely in 6502 assembly
Back to top